As i never finished this modification off. and Karl reached out to me asking me if it was worth doing. i had a job to do tonight doing some fun stuff for my son for the aeroplane flight. So thought i would kill 2 birds with 1 stone. do some testing
So it calibrated very well with the new strip lighting now i had the head crash into the camera mount think that might be the cuse of my issues. I am currently working on a new mount made out of resin.
As you can see from the little test i put together. did a quick trace using a hand drawing, yes i know next fine artist.
wont win a prize for artisticness.
i then i tested to see if it cuts where the drawing was.
As you can see my alignment is well off and the image is enlarged.
The result is crap, So i think i will look at some videos on calibration as i want to be able to put this to bed. so the first job i will do on my return will look into this and get it all working.
Prusa printers
i will be looking at repairing these machines on my return as i want to get the project that i started before it broke.
This will then lead on to my adventures in CNC and using soft limits until i get time to wire up the end stops. thankfully after i get back i have 1 more trade show to do for this month so can do some more stuff.
More fun with sublimation
going to be getting my head around T-shirts and mugs and some other fun promo bits for the man cave. might even set up a shop selling some bits who knows.
SLA Resin 3d printing
more of this coming up as i learn more about it. going to read up as sure my recent fails have been down to me not doing things right. not the machine its self.
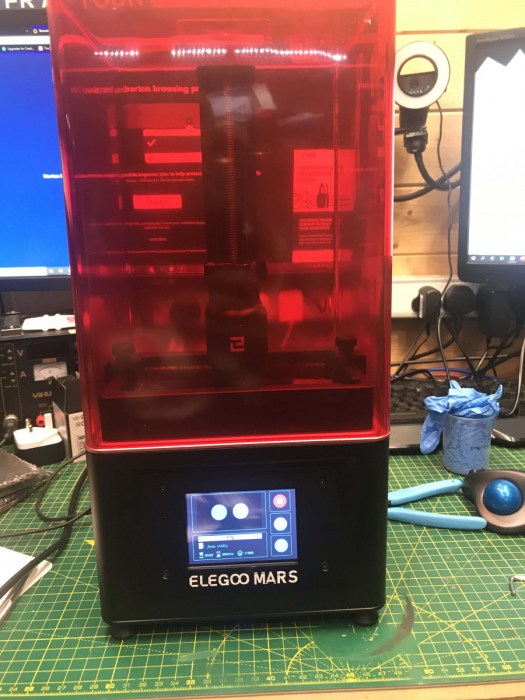
Yes, at last, i get to take the Elegoo Mars printer out for a test drive.
So i have already tried this mount on my standard Prusa FDM printer on quick and dirty settings and it printed but had some issues with the camera holder, it fitted but need a lot of sanding to get it to work right. so as i now have a super fine detail printer. why not make it out of resin.
In the end, went for the yet another camera mount which i cut from acrylic and blogged about on here its good but the head hits at the bottom of the bed if door is shut on the cutting bed so have been thinking about ether modifying mount or designing another one.
I was chatting with a fellow laser cutting community group user who was asking for my advice and was going to buy this mount off an Etsy shop. This got me thinking what if i printed this in resin would be nice and smooth and easy to put together.
Fired up Chitbox and dropped in the components for the mount had to rotate some bits and then ready to slice with standard 0.05mm layer hight profile standards
this is my first attempt ad printing in sla other than the test samples in the previous review
Now not sure how well it will run as haven’t added rafts or supports but why not just go for it going to cost me the minimal amount in resin. hoping this comes out well.
wish me luck will be back in the cave in a 2hrs to see how it does.
The machine is all ready to go all i have to do is select mode off the U-disk and 2hrs later should have bits ready to clean and cure.
Total fail 1:
Print stuck to the build plate but had layer shift and the part was flatter than it should have been.
wish me luck lol
Fail Number 2:
Printed raft and supports then failed again this time leaving a residue on the print surface this required a big clean up to remove have also marked the print surface.
What Next:
As i am about to get on a jet plane for a week away will do some reading on supports and print methods to see what i can do. as i am sure it’s more my error than the printer.
will update this post on my return as will be a little bit less stressed than when i was doing this first run project as had a large amount of bit to make for my day job so it’s on a shelf till i get back then will make a proper space for it to live.
As with most printers this started off life as a standard printer well in my case this is a second-hand printer that allows me to do a lot of promo bits for the cave and for my day jobs the joys of being someone mad enough to run 3 jobs the family business/Crafting business/Man Cave, blogger. The wife might argue that the blogging bit is no a real job but i beg to differ.
I got a great deal on a second had printer load of mugs and some sublimation printing paper.
drove 30 mins out of town to grab this kit and well worth the money i paid a lot less than the printer alone would cost.
So why the Ricoh printer well in my case space is premium and this is a nice compact unit the fact its ink-based refillable cartridge system is a doddle to install and use.
its great machine to learn on as there is a lot of information on this printer on youtube so lots of setting up guides.
as new to this being a bit of a learning curve but getting there finding heat and time is the hard part of sublimation printing.
but once you have got your head around that it’s easy. i am getting there slowly but think i have now found the sweet spot on the printer side just to get the heat pressing parts
pros:
Small and compact A4 printer.
Easy refillable cart system.
lots of guides on how to use this printer
aftermarket inks cheap
Cons
sealed ink cleaning bin single-use only have to replace so far looks like will last a long time.
issues with windows 10 and drivers have had to run off the LAN
inks are expensive if brought off sawgrass
I would recommend this machine for someone who wants to set up something out of the box without having to reset chips and other complications
I have been after one of these bad boys for an over a month but they are hard to find in stock as in short supply in the UK as so popular as the 3d gods have been reviewing them. elegoo support on amazon tipped me off of stock returning and i managed to snag the last one on amazon. time to review it.
What’s In the box?
nice compact box with lots of foam to keep it all safe.
Very impressive packaging from such a cheap machine after removing the foam you are greeted a with a box labelled tools and the printer.
still more foam but can never be too protective.tools and power supply
after removing another layer of foam you will find the print plate lose encased in foam. i finished unpacking the tools and printer. You are greeted with a nice easy to use manual. so what’s in the box?
Hex driver not sure what this i used for probably changing the vat screen
Printing plate.
Snips for cutting supports off.
2 x Hex Keys 1 for locking the print head in place the other must be for maintenance.
Measuring jug for filtering the leftover resin into before pouring back into a bottle,
5 Face masks not sure the need for these as resin does not pong.
Paint filters for straining used resin through so you can return it to the bottle.
Some spare nuts and screws just in case you lose any.
Nitrile gloves couple of pairs will need more
3d printed 45-degree drip tool.
Plastic scraper for removing prints.
Powerpack with local plug in my case UK.
Instructions
USB Key with rook test print instructions and slicing software
All thats in the box
What’s not included.
Now you will need to buy resin separately i have gone for the Elegoo standard resin 500g transparent green for £20 off amazon. going to order some other colours soon.
You are also going to need some bits to clean and cure the print afterwards. After watching some videos i brought a pickle jar airtight this comes with a drip tray some 91+ % isopropanol alcohol to clean the print, some UV light to cure the print this can be sunlight.
I have ordered a UV light and turntable that i will make a curing chamber in the future will be an upcoming project.
The Setup.
This is probably the quickest setup i have ever done on a 3d printer.
plug in the printer and turn it on makes a beep and its ready select settings and manual raise the z-axis by about 100mm 10 presses on up button.
Get build plate loosen 2 grub screws and attach the build plate to the z-axis
Press the plate levelling button the plate will home and move up and down a few time then tighten the grub screws. plate is now levelled.
move build plate 100mm up the z-axis.
Check the uv screen is working this step i skipped as it was late.
fill resin vat to 1/3 full insert the USB key and press the printer button to navigate to rook print and press play.
Cover the machine, with UV cover i sat and waited till i heard the pop sound this was first layer being taken up by the build plate.
Come back 4hr 30mins later and print will be done i came back next morning.
test print started 11:30checked on it about midnight ish
The Morning after
Curing the print.
now this is the dangerous bit and requires cloves do not handle resin without gloving up as this stuff is toxic. i also put safety glasses on as just don’t want to risk it.
letting access resin drip of the build plate.
using the supplied 3d printed bracket I placed the build plate on it to allow any access resin to drip off the plate.
after 10 mins i came back using the scrapper i gently took the prints off the build ad plate put them into my pickle container filled halfway with isopropanol alcohol shook the sealed jar to remove any access resin.
In the uncured prints go. 10 mins in 99.9% alcohol
i then put the prints outside for 30mins to cure.
marks from getting it off the build plate
The result.
so crisp 0.05 layer hightlook at the detail just wow
Wow I am impressed with this printer yes it’s a bit messier than an FDM but the quality of the print is amazing going to start my first project to see how it handles a model off Thingiverse.
Summery.
I would recommend this printer for small quality prints it’s quite easy to use so far will review the slicing software shortly. as its resin would watch a load of videos first as safety is key.
Pros
High-quality prints.
Easy to set up and use.
Not too smelly.
Compact unit.
Offline printing.
Well packed.
Price.
Cons
Risk of harm from resin.
The power switch is on the back
the USB slot is on the back
Getting material off the build plate is a little hard
All in all happy with my purchase can see it being a good fit in the cave. would recommend it to everyone just finding them has proven to be a challenge as in sort supply at the sale price as people are buying them and marketing up to £400+ on ebay.
A for future mods to the machine, I have a USB extension lead will try seeing if it will take it as will then mount the USB at the front and have a led extension with an on/off switch will see if i can then add the on/off to the front of the machine. so minimal mod to make it great will cove this later. will post the first project later once it done.
After a lot deliberation about what heat press i should get, i decided that the 3D press was right for me as can do more than a press a T-shirt and do costers.
Which is ironic as my first job is to do some costers for a trade show for my other business.
On my return from wales disassembled my cr-10 and cleared space for my new toy
ready for new toy
Got to work on Tuesday after a week away to be greeted with big-box do love new toys.
now to unbox it so what’s in the box.
1 x set heat gloves
2 x 11oz mug wraps
1 x 15oz mug wrap
Spare vacuum sheet
Spare Tubing.
Power Cable
Manual.
the beast of a machine.
All and unpacked and removed all plastics and packaging fired it straight up and through i would test out a coster fired up the tried to test vacuum it but just buzzed nothing happened.
I then realised i had to connect vacuum tube to nozzle now vacuums. fist test run didn’t sublimate to well as was not making a proper seal.
I have since watched a video and no know i have to make cuts around the outer edges of the paper to get it to make a good vacuum seal so that was my next issue solved.
In the video i watched it showed 4 costers being done at once 180c for 4 mins. so i tried that It did sublimate but colours are washed and not right.
Ment to be a navy not purple not bad second attempt.
I think this might have been as i was running 1 only might need less time so tonight i will be running the test again 80 seconds on the clock and different print settings.
Arg no joy now think its pressure issue with the machine will do some more testing on this tonight as i have read over the manual and want to check vacuum pump as was mention about removing water. as i printed 2 costers to a sheet second one i applied to a mug with 180c temp and 180 seconds now its worked colours are right but fuzzy so going to reduce the time as read this is caused by too much time to see if i can get my sublimation temperatures/times right.
Not good overcooked but great Colour sublimation and loads of dimples on the back of the coaster
Finally cracked It had some shit coasters that don’t sublimate well as just tried with some name badges 185c 4 mins can do 6 at a time no issue Colours came out well
I know it was late it’s not straight
I also tested a metal bottle opener worked well I know it’s not straight was 2 am in the morning
This is a great machine now that I have figured out my issue being cheap coasters. As with my sublimation journey, it’s been a bit of a learning curve.
Summery
This a nice solid build Machine with a wide range of uses for sublimation. It’s very user-friendly and easy to set up. Heats up to 180 c in around 5 mins or less. I am happy with my purchase
Pros
Silicon moulds for range items ie phone cases mouse cover travel bottles, mugs.
Compact uni
Vacuumed seal
Easy setup and use
Cons
Not cheap
Some noise when running
This is for a creator and can see it being a useful part of my side business. now i know its just the issue with cheap coasters. I have now found a reliable source of sublimation blanks should be plane sailing.
Been a busy week in wales holidaying and having some well-deserved rest and doing some tidying up. god i have a lot of useful stuff that i need to sell.
been a tech-free week for me but have been busy in the background buying some new bits of kit. I have also touched on some of other new bit but its time i did some in-depth reviews in my not so live posts.
I will start with the ELEGOO Mars UV Resin printer has been featured by a few of the 3d printing gods but time for me to have a play. should be landing at the cave on Tuesday have ordered some transparent green resin to give it a test drive.
I will also be reviewing the FreeSub Heat Press 3D Vacuum ST-3042 sublimation machine. As for my day job i have a trade show coming up the week after next so will be designing some costers, mugs and bottle openers. this is already at the office waiting for my return to London.
I will cover my Ricoh SG-3110DN printer and its refillable cartridges that i got from Ink Experts. setting up an ICC profile in adobe products.
I will also cover my Freesub automatic mug press.
Removal from my cave:
My CR-10 is going to be removed from the cave as ist become unreliable will move it to wales so and revisit it at a later date.
Repair list:
my Prusa printers will work on these probably after i return from 2 trades shows and a week away some were hot and sunny will be moving things around the cave to fit the new equipment.
Time to play with:
Hoping to get to play with my CNC machine as got some ideas for Christmas presents and a bit i want to make.
right time to sleep as i have a 3+ hrs drive tommorow back to london.
After a month i have finally cleared most of the crap out of the man cave now to fix 3 x 3d printers somehow. as all 3 have different issues. I have decided that if i cannot fix them i will sell them off as only really need on a working printer to make parts. will be updating each section as i fix brake or sell bits on this post. will be covering the CNC machine shortly as the need to fix my 3d printer to make some bits i have designed to get me up and running.
CR-10
the cr10 is showing very high temp when switched on on the heat bed not sure why. going to re-solder the connector. see if this fixes the issue.
Prusa Mk2s MMU
this constantly jams the nozzle so going to look on the world wide web for some answers if not might convert it back to just being an MK2s or 2.5s depending on time and money or i could upgrade it to a Haribo edition.
Prusa Mk3
This keeps jamming up not sure why as was working flawlessly for the last 6 months again this will be a web search for an answer as i have tried lots of things that i keep thinking i have fixed it then gets to the second layer and block up.
For sale list:
Trinus 3D Printer
going to sell my Trinus 3d printer as just too small for me and not worth the time and hassle so open to offers on it comes with laser brand new extruder and enclosure with LED screen and tools spare nozzles. if anyone is interested contact me. it powers up but will need some tinkering to get it working right. open to offers
K40 modified laser
This is my k40 laser comes all working will it comes with a C3D controller board flow switch and upgrades panels featuring temp gauge e-stop switch and flow led. upgraded inline and modified exhaust fan air assist pump. looking for £400 ono
New Equipment Wishlist.
3D heat press as going to do a bit more sublimation.
Currently, have 3 non-working printers the joys of life. I will be doing some repairs this week as started on 2 projects as in did the design work then for my printers to let me down so have a half-written project that i cannot show yet as i didn’t manage to make the parts.
As I keep thinking i have solved my issues with the Prusa mk3 for it to fail again so i think i am going to walk away from it for day or so fresh eyes. I have compiled the latest version custom firmware so will flash it shortly and see if i can get the CR-10 back on working list. before i tackle the 2 Prusa machines.
meanwhile, i have finished off the CNC and vinal cutter dye-sublimation printer racking.
have since swapped the CNC machine around by 180 degrees for ease of cabling.
Just got to make some bits for CNC enclosure and i also want to add the limit switches this week to the CNC machine will have to see what time i get as i have some more jobs coming up.
giving my self to the end of the week to get the cave to a state of working use. think i need to sell some equipment i don’t use, make room. going to move some more stuff off my workbench as need the room. will add some more pictures showing this later.
I am working on 2 or 3 projects in the background and taking on private work to help pay off some of my outlays on the cave as this is a hobby and not a sponsored site i wish it was but as i am not a celebrity of youtube yet for the time being i am doing things the old fashioned way.
only part of the 100+ badges batches that i am currently doing for a kids camp who wanted to stop using plastics as name badges as wood is good for the environment.
As someone who has a list of equipment on my wishlist, i keep my eyes on eBay and facebook market place for deals on second-hand equipment. i have been after a dye sublimation printer for some time as had some mugs leftover from heat transfer vinyl job i did a while back. so the other day one popped up on facebook market place so i decided to go for it. so got a printer with some ink left in it, pneumatic mug heater and sublimation paper, 20 mugs white and heat sensitive and a refillable ink cartridge system with ink. So on Wednesday, i took a drive to go get it and last night i set i tall up int he cave. i will start testing over the next few days i have ordered a new wast ink bin for the printer as one installed is full. but now means i can do full-colour mugs so more private work to help fund my hobby. when my sub-business i fully and running will add links to the site.
Ricoh SG3110DN with sublimation ink installed mugs and pack of paper.inks that came with the printer might swap the ink for a better brand.Automated heat press that came with the bundle. Lots of mugs in stock now to play withlots of sublimation paper for the printer
will be testing over the next few days to make sure all works fine. new post on projects coming soon just had a week of private work going on should be clear by mid next week.
Managed to figure out the issue with my 3d printer well 1 of three the second big scale printer just needs a flash of the control box and rewiring. the third one is going to be an interesting project in its own right.
but next up is starting to prepare the CNC machine for use so waist board i have to go get from the local DIY store is 55cm x 38cm. then it’s going to be to who fix it to the aluminium bed probably with some carpet double-sided tape.
i am then going to add limit switches still working on way to do this easily have figured out the control box wiring just need to figure out where i am going to mount the ball arm micro switches. i have also designed a converter for vacuum inlet but more of that to come.
i am also going make some wall mount filament spool holders as Prusa has designed some for free download that i will make need to make 6 of them, 4 for the MMU and 1 for Prusa mk3 and one for large format printer.
Evening update as having a rest from the current private job i am doing. I wanted to play with my new toys so did a mancave mug for fun think the colours are off a little bit but still learning could also be the inks are old so might install a new set. so far impressed well worth the money.
fingers crossed this works.Happy for a first attempt
As i did promise to do an update of some shots of my lighting all wired here a preview of it in action,
I am running 3 wifi controllers so all lights can be controlled via my mobile phone or Alexa or other automation systems i am yet to install.
have 3 controllers for my led lights
i have installed 3 sets one for mood lighting that the equipment lights centre lights are if i need more lighting in the cave and laser bed lights are for the 50w lights
Lights in actionmore of the lighting around the cave.


You must be logged in to post a comment.