back on with the updates to the CR10 v1

so where we left off printer moved home and levelled then failed so in this exciting chapter going to strip out the control box and add a new brain to the system.
so as I am upgrading the brain I might as well do some more mods so a colour touch screen is included in the kit. so will be adding that as well. I have been watching a few videos on compiling merlin. so have downloaded the nightly bug fix and will talk through compiling later on.
so time to jump back in there. as I have one working printer at the moment I am going to start off with printing the new screen holder as going to lose the control box completely. these things take up space.
so over to Thingiverse and found this Slim and Elegant BTT TFT35 E3 V3 dual-mode touch screen Extrusion Mount see the link here.
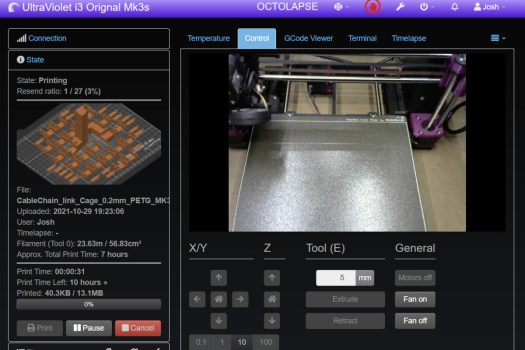
Over to Prusa slicer sliced and uploaded to ultraviolet. as neon orange is offline.

away we go will check back in 9hrs time

9 hrs later one screen adapter is done

All done 
All cleaned up
some M3 screws later and it’s ready to wire lol ok I forgot to take the screen protector off never mind let’s get it all working first.

it fits 
stand offs fit 
all lines up 
spot the reset button 
all screwed together time for some wires.
one part is ready to install some m4 bolts and t-nuts and will fit onto the frame.
I will print the pro enclosure once I have the printer working online as the cr-10 is the only printer big enough to print it. will print all small parts whilst I get the cr-10 working.
have tried the y motor mount and dont fit right so abandoning this upgrade for the time being. now to do some compiling
Compiling merlin for the first time.
This is sort of new for me as in have flashed my old original cr-10 board before using Arduino ISP programmer and source code. but now it’s all moved over to the Microsoft VScode environment so much easier to do. as the cr-10 has a pre-built config file it’s for the new SKR E3 mini v2.0 BigTreeTech mainboard that’s repacing the stock board.
so you are going to first up need to install VSCode / PlatformIO programming environment. there are plenty of guides on this. once done you will need to head over to https://marlinfw.org/meta/download/ and grab the latest bugfix file you will then find a link in the config folder for the example zip this houses the configuration.h and configration.adv.h files and boot screen files you will need to drag these into the marlin main folder.
open the project in vs code.

in my case I am installing bl touch so needed to change settings to include bltouch and safe z home, also added about probe offset and a handful of other bit. There are vidoes on this so i wont try explaning it all.

I then selected my board type in the core settings. and built it. after the compile was done I found location firmware.bin and copied it to sd card to flash the mainboard. you will need to power on the machine and it should all be ready with the new firmware. will test this along with the new screen shortly same applies for that can be custom-built or you can just use stock firmware.
Now whilst doing my research for this project. I saw the filament run-out sensor porton the new screen so going to use my filament sensor from my old ezout board as it’s compatible.

I am also going to use neopixle function as well so have ordered 1m of led tape. will be experimenting with this soon as I will need to recompile the firmware to use the function actualy will turn it on now and play later time to do some more reserch as wont complie needs some addtional settings will do them first before first switch on as then when i assemble the board i will be able to playwith it will runn cable ready for it so all in place for when the tape arrives

I am also going to name the machine so i know its talke the frimware before i start testing.
now to upgrade the components.
So out with the old in with the new:
so toime to take the old board out
wiring all swapped over wiring to the new board so that it’s ready for its new firmware. whilst I’m doing this have also fitted the final part of the last lot of upgrades to the machine. new motor bracket fitted.

time to swap over part 
halfway done 
all swapped over
Time to switch it all on
Time for the initial turn on with new screen fitted in enclosure hole as till I have finished off the new mounting box for the machine won’t mount it till then.
turns on lights up and turns off ok a little bit of googling figured out the issue because i have bltouch wiring plugged incorrectly.
now I can see I have messed up the screen with an improper firmware update. long and short of it don’t copy the update to the sd folder to the TFT screen.

only copy theme folder content TFT model number and config.ini and just like that is fixed now to flash the firmware I have compiled with fully bltouch customise on. all done did have a message that bed mesh couldn’t be found but after running bed levelling got a saved to eprom message and that’s resolved that.

wow, it’s so quiet moving around the printer all I can hear is the noisy control box on my list of things to modify.
Ready to print have done my z offset wish me luck.
nozzles hit temp beds not heating up time to check connections. brb. ok after checking all connectors and solder joints i have done over the years was poles on the SSR some how got switched now heating like a champ.
My first print failed as need to watch a video how to do z offset done right as was about 4mm off the plate but on a realy grate side it works it runs were its ment to. so very happy. watched a video all of the menus have changed but i think i have got it just going to start a test print before i move the machine back to the man cave.

bed seamms very off not sure if its down to my bracket modification.going to look for the bracket set only as then will save money on getting this sorted time for a evening of reserch fingers crossed i can solve this i am going to put this down to my mod of the braket
So have found braket correct x axis braket and orderd it and a new braket 10 to 15 days i will hopfuly be finishing this project. as i am waiting for parts i will do some other mods then leve part 2 here and come back with part 3 when the parts arrive.
Time to print some Upgrades whilst i am waiting on parts
As my wirings got heavier going to print a drag chain to sort that out so overnight parts on the Prusa will report back in the monring.

all done ready to fit. had a near miss with 2 clips shakeing loose. but it servived the nite.

lets see if it works.

It sort of works but is a little weak for my likeing i am going design my own chain holders for the liniear ralil mount and were the old exstruder motor used to be to use with some stock chain. got to free spome space up from my drive as fusion isnt working,
Hot end part cooler
been looking over thingivers for other mods i can install on my machine as you know me with this ever elvolving project. so as i have direct drive installed i am limeted with hot end cooling mods as i know the stock one is less than great so i have found one that i think will fit so time for another 7hr print. going with the AJS hero v2s as it has bl touch mount and uses factory stock screws so should fit.

morning time and all cleaneed up very well will be stripping offending bracket later in the week from the machine and install new one wilst i wait for x-axis braket that is alreay shipped from china.
test fit with new braket and have removed 5mm off the top corner with a dremal saw bit. Now a nice snug fit with out interfering with the bracket or hotend.
just got a ghost trap to build for the boy before i get on to stripping down the hote end and removing it ready for the new liniear rails bracket that is shipped already so 10 to 15 days time the project will resume.


You must be logged in to post a comment.