New Year, New Me: Transforming My Mancave and Upgrading Equipment

Embracing Change This Year

Welcome to the exciting journey of “New Year, New Me!” This year, I’m determined to take control of my work-life balance and create a space that truly reflects my passions and interests. It’s been no secret that juggling work obligations and my blogging dreams has sometimes felt overwhelming. But as the clock strikes midnight on the new year, I am ready to revamp my home environment starting with the mancave!

Organizing the Chaos

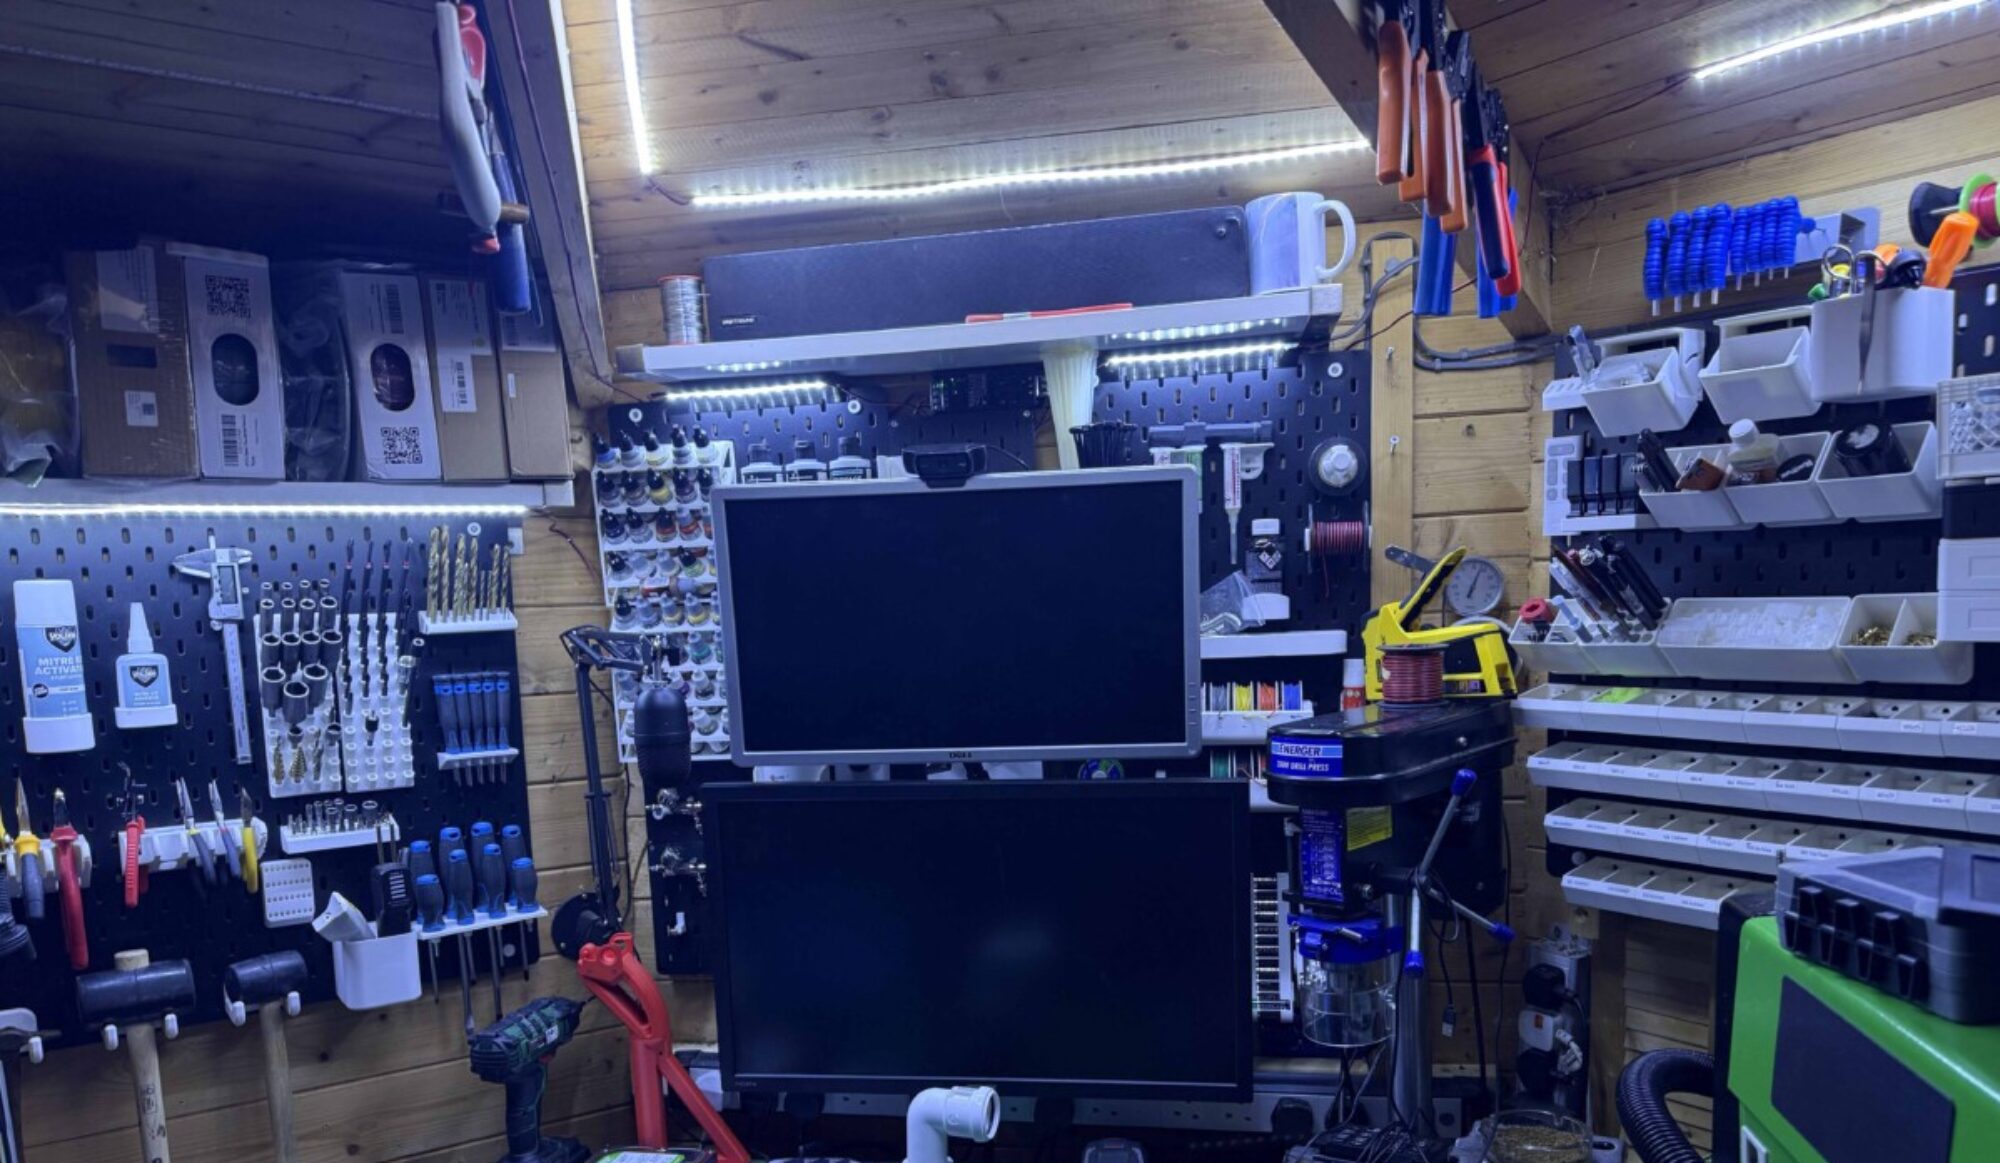
Let’s face it—right now, my mancave looks like a bomb went off! House renovations can be a blast, but the aftermath can be less than appealing. My first step was to tackle the clutter and organize the space. With some dedication and a little elbow grease, I’m transforming this chaos into a well-structured haven for creativity and relaxation. It’s amazing what a little organization can do for your mindset!

Upgrading My Tech Setup

As part of my new year resolutions, I’m excited to share some killer upgrades in my equipment. I’ve recently acquired a Bamboo Labs X1C along with two AMS units, and I couldn’t be more thrilled! In addition, I’ve decided to donate one of my Prusa MK3s, keeping only one for essentials, but I plan on upgrading it soon. The highlight is my plan to purchase a new SLA printer, as my old one had seen better days. Once I have the space sorted and have sold some items, I can’t wait to dive into new printing projects with my shiny new printers!

Travel Blog

As we as a family love to travel will be covering our adventures starting in May with a trip to Shanghai and Tokyo for half term holiday will be ticking 2 more Disney castles off my list leaving just one left to see in Hong Kong to complete the set. But that will be another trip.

Gaming Blog

As my other love gaming going to try adding some more gaming bits might play a random retro game form retrocera and blog about it. see how much time i get.

any how back to getting tidy more to report soon.

Wow what happened where did i go?

Cannot believe its been a year nearly since i posted last. life’s been a little hectic with a 6 and 7 now year old and my free time has gone out of the window.

So what gone down since i last posted got a new printer bamboo labs carbon x1 with 2 x AMS multi material.

still not cleared the man cave up or hard wired it to the network as that’s going to be next year i think.

been working on my arcade machine now have some life but need to wire all up and configure every thing in to retrocera so i can get it all working this is going to be time consuming but worth it.

i will also need to learn LED splicer to get the cab flashing right. so i will start on that

still trying to launch gaming junkies but haven’t had much time to develop it. hoping the new creative space we have been working on upstairs will be up and running soon.

so will be back to designing and creating soon as me no make stuff makes josh a dull boy.

An Update on the Website

Hey there!

I just wanted to give you a quick update on the website. I apologize for the delay, but my day job has been keeping me quite busy lately. On top of that, I’ve taken on some additional private work in the background, which has added to the workload.

However, I’m happy to say that I can see the light at the end of the tunnel now. The workload is starting to ease up, and I should be able to dedicate more time to the project very soon.

I understand that delays can be frustrating, and I appreciate your patience and understanding. Rest assured, I am committed to delivering a high-quality outcome for this website. I value your trust and want to ensure that the end result exceeds your expectations.

If you have any questions or concerns, please don’t hesitate to reach out to me. I’m here to address any queries you may have and provide regular updates as we progress.

Thank you once again for your understanding.

Best regards,

Josh

Finaly coming back down to earth

The right server moved completely back with a bigger better server also 2 new websites coming just need time to develop them one about gaming ones about selling my crafting work. more information. there will be some crossover from the 2 to hear as well.

going to attempt to fix my switch as it’s been deaf for a few years.

filled my 1tb in my steam deck so I have ordered a 2tb internal will document this from start to finish.

will do some more on my Retroid 3+

Been playing with enclosure designs for the Jsaux mod case.

been also teaching myself more about 3d designing. as managed to snap my alarm fob so had an idea will share this and more over the next few months

Upgrading Steam deck from 512gb to 1tb

m.2 2230 1tb steam deck

After a week end at home haveing some family time as got a lot going on in the background including day job. i spotted a post on the steam deck Facebook group that scan was  doing a western digital m.2 2230 NVMe  1tb unit for £99. and just like that i have one stitting here next to me on the coutch.

Lits ot bits you will need

you are going to preform this operation you must have the following.

  • Small Philips screwdriver
  •  pry pick
  • 2230 NVMe 1tb drive 
  • Tweezers
  • NVMe enclosure usb c

Optional item

  • Steam Deck Repair Jig

Optional parts

As I haven’t been using my 3d printers for a while and had some purple petg going spare and to make my life easier. So I decided to print the Steam Deck Repair Jig by ryohazuki224 link here.

As my printer isn’t big enough to print in one go I have decided to go with the 2 septate sides so 8hrs later and I have this and am ready to take my deck a part.

Steam Deck Repair Jig

Cloaning your NVMe internal drive

clone 1tb Steam Deck

This step is purely optional as in my case I have 500gb of data on my deck and downloading will be a pain in the arse.  I have decided just to clone my internal drive to the new 1tb NVMe.

So first up i have to install my new NVMe drive  in to an enclosure I brought one off amazon cheaply just input it in to the enclosure  and plug it in.


Now over to the deck plug in the new drive and then hit the steam button.

got to desktop mode let i boot in to desktop.

now in desktop open up konsole. this can be done by going  steam menu>system>konsole.

now enter the following. clone command: sudo dd if=/dev/nvme0n1 of=/dev/sda oflag=sync bs=128M status=progress 

now hit enter

This took me  1364s to complete. now to swap it in to a the deck.

Opening up the steam deck

Make sure you have shutdown the deck and removed the memory card.

First up are the 4 shorter screws in the center of the deck place them together.

now the 4 outer screws they are slightly longer again place them somewhere safe.

Now using the pry pick open up the deck carefully. going around the outer edge of the deck popping it open.

Now the back cover will come away.

you will be greeted with the following.

Peel back silver foil removed screw.

remove two small screws top bottom of metal plate wiggle plate free.

Disconnect the battery cable.

now to remove the drive 

Now to reverse the procedure montage time..

Time to reboot

powered on all worked  that was well spent 30  mins and we are good to go 1tb on board all was working then tried to move a game from sd to internal storage something when bad think i should have played a game for before going bad got a stuck on steam icon. oh well going to reimage it.

Re imaging the deck

As i had planed to do this in the first place i had already prepared a image usb drive with recovery OS on it.

to do this need to go to steams web site and download the recover image. then using etcher or similar burn image to a usb key with more than 8gb on it.

As i have tried to recover the software now going to format and start over hold down volume down and power will here chirp. let go boot USB image.  

you will be greeted with 4 icons you want the one saing reimage.

using your finger tap it once and then you will be greeted with proceed button tap with finger let it do its stuff then next dialog will be reboot press with finger can now remove usb and plug back in to the mains.

will now reboot using fingers navigate and set it back up.

all working fine not sure what i did wrong. but all fixed.

again worth the £99 sorry no images of this part but you get the idea.

Happy New year

Right back in the cave after a cold snap Has ground things to a halt for a month.

new year so time to have a cleanout will be migrating some equipment out of the cave once working. the custom cr-10 build I am going to finish it and then will ship it to wales with some more tools as lack being able to create it when I am away.

so why am I losing a printer well fiber laser will be coming soon so I can start doing some fun streams still working on setting up and I need to raise the connection speed to the shed as speeds are still capping out below stream minimums.

also going to clean out the projects that failed completely as I need to make some space and add additional extraction for the fiber laser. also going to fire up my CNC machine again.

will add more in the next week or so.

Set up of my steam Deck and review

Right, let’s get started as I have confirmation my steam deck is packed and about to leave the USA to me I am getting myself ready for this end as I am hoping to get it before i travel to holiday home.

so first up I going to print the steam deck life saver as recommended from a video I watched on YouTube free to download here by LWC on printables.

Time for  a quick 3+ hr print.

All printed still waiting for a tracking number from steam but on with the preparation. next up sorting out my roms for a steam deck build.

I am also going to do a separate build that’s bootable on the steam deck this will be housed on 256 sd card this will have 25 games on each system going to the best of the best. that will be worked on in the back ground.  More about this at a later date..

Next i am going print a stand so over to thingiverse. and found a nice stand for just propping my machine up so this is a 13 hr print wish me luck. can be found here by ShaunDarkLord

Sliced and ready to print away it goes will check back in a few hrs. works on flat surfaces I don’t have to Meany as working on my deck on the couch. so don’t know how much use I will get out of this print.

The pre Packing my bag to go away

This is the down side to ordering a steam deck. GLS has my deck its meant to be coming parcel force yay at least i have some control of delivery by the Wednesday my order now got a GB multi courier this means Evri is delivering my deck argh no control no warning no way to change delivery dates…

any how let take my mind of thing and pre pack my bag.

Thursday get notification of parcel has been received by Evri. Friday morning get they got the package. 

11:20 your parcel is out for delivery. Now on a normal Friday this would not be a problem. But this is not a normal Friday as we are going to our holiday home. at 3pm the parcel due time is  between 4 and 6 pm eek.

 Wife is on call delaying us till 4 i have my son and have come home waiting for tumble dryer to finish now 5 packed the car time for a comfort brake  before 3 hr 30 min drive just about to leave the house when the door bell rings its my package so straight in the boot with my bundle of joy,


4hrs later time to play or Update and download.

I have arrived in wales and put my son to bed time to play. as I opened the brown box I am greeted with a happy message to plug the deck in and power on and so I did I then chose my language time zone and log in all going well sort of 60meg line Vs 600 Meg line in london. lots of updates and time to down load some games that take around a hour each when 40+ GB So not played a lot but all updated. have noticed a few silly things with the system. there is no way to sleep and download. there is a work around using screen dimming and leaving system on download page. as wont sleep. Note to self Elden rings probably wasn’t the best bet to down load first.

I also changed the sleep setting from 1 hr to 20 mins no way to change it back again this will probably change soon in a update.

So time to que all my games from the library leave it over night to download and install everything . 

The next afternoon.

We had stuff to do at the house also dug out a i7 pc to upgrade in a future post as want a power house down in the work shop for streaming. more on that  in a future blog and how to run ethernet out doors.

its working spent a fun few hours playing games i had downloaded off steam servers to my deck. so far blown away by the steam os and handling. of the games system.  will post a video of game play soon just building something capable of streaming

but wait there’s more i can do that just play new games on time for some old school retro gaming as this will play pretty much anything.

added my life saver to the case works well  and stops the deck falling out of the case. defiantly a  must if you have a 3d printer. well until i invest in a tough case for it.

Adding Emu Deck

As for some one who loves retro gaming this is a must for me so over to desktop mode. the first thing your going to need to add in firefox as its not pre installed so open discovery and serch for it and install it.

I also looked for ProtonUP as this is proton GT a better version installed proton.

now Firefox installed go to emu deck website and download drag the emudeck.desktop file to the desktop now go to start menu  search for konsole open it type passwd set a password now can close the console. 

now double click on emudeck.desktop this will take some time on a slow connection. i have a 1TB sd card installed and thats were my games are going to be installed so when prompted click sd and ok

then i selected expert mode and ok then next screen the ok  for the next few screen as all installed you will then prompted for password  so i enter my freshly set password and then the install will start. away it goes go make a cup of tea or coffee as this is going to take a wile. at the end. once its its done will ask for a retro achievements password free register will record all achievements so worth doing. and then your done go to your sd card and you will need to add roms to roms each system has a game folder. will need to install bios files in the bios folder now this is a gray area and i am only using backed up roms of games i own. but if your intent on getting games google is your friend.

A few days later

I have been busy coping generating artwork set for games i have added i have approx. 30 working emulators i can add more but have gone with console and handheld gaming systems and joystick compatible systems.  the reason for this is then don’t need a keyboard out to play them. still working on getting some of the emulators to work but again its just a bit of light reading should be able to solve all issue as such a great community surrounding steam deck. The updates are also coming out every few day as well so if its not working yet it will be soon.

Views so far...

Loving steam games loving how well this play most emulated systems there area  few a that are a little glitchy but the updates are coming think and fast.

This thing is very customisable with plugins as well and have also installed ducky loader and several plugins to theme the deck and show compatibility with non native games and vibrancy of the screen as well as a CSS theme builder will also be adding new start up videos. 

If your a lover of gaming this is the device for you. if you want perfection out of the box this is nearly there but with some tinkering it come close to being perfect.

Docking your deck

I have one of the 2 docks I have ordered the first dock is the jsaux as recommended by a few youtubers and I have also ordered the official dock from steam this is on its way to me. So why 2 dock well one will be permently fitted in the man cave so i can get screen shots and film mods in the future the other one will be my traveling dock. 

well all plugged in and it works great. in game mode screen turns off and my 4k tv was the interface with external 8bitdo works perfectly. i then switched to desktop mode this was a little different had 2 screens I decided i only wanted one so over to settings and display enabled the big screen as main screen and deactivated the deck screen. i have also plugged in my Logitech wireless k400 keyboard and it all works like a dream. much easier than my travel one. but that’s for home life and not life on the go. 

Protector case

I have been looking at serval different cases and this seemed the most feasible for me as will fit in standard case that the deck shipped with so at £23 was a mid ranged price its very good  nice textured grps and kick stand works well.

Will be adding more

happy so far will report more on this shorty with some videos and screen shots and things I have learn over the next month.

Steam deck 512gb edition plans

Time to join the revolution as Q3 comes to an end i have decided to join the que.  As i do love a machine i can tinker with.  have invested in 1tb sd card for this bad boy and Bluetooth keyboard with track pack. so this post with be what I’m looking to achieve when i first get it.

Just waiting on shipping should be with me within the week. knowing my luck this will be out for delivery on the day i am traveling to wales. hopefully can get it before that or my friendly next door neighbour will take it in for me. thats worst case senario.

Accessories

Already got:

Bluetooth keyboard i have gone with a travel one as folds up nice and small and will fit in my back back on my travels.

1tb SD card A2 so 180 write speed should give me plenty of space for emu deck.

will be paring my 8bitdo SN30 Pro or got a Xbox carbon controller kicking around for it 

3d printed dock more about that in next post  as pictures been added after the post release lol

Looking for:

Dock going to look for a dock for the man cave so i can film and have stuff on the main monitor looking for one with a ethernet connector built in and eventually with m.2 port as that will come in handy but that will once I have paid the deck off.

travel bag as the case it comes in might be short lived if I get a protective case with a stand.

Protective case

Emulation

Emu deck is where i am going to start my build i am going to start off porting all the roms of the rick dangerouse  image  i will aslo be adding some backed up games from my switch and GameCube along with some ps3 and ps2 games as well.  I then might look at my wii and wii u catalog as well as tempted to try that as well.

PlayStation 4/5 remote play

its been done so i will be trying this out as well and documenting my journey as something I would love to be able to do as don’t get enough time with my PlayStation as anti gamer wife.

Steam OS

My steam liberty is very small 3 games so i will be increasing this over the next month or so.  I am looking for recommendations.

Epic game collection

going to give this mod ago as over lockdown have been adding stuff to my library

Oculus 2 support

apparently its a possible modification so will be looking at this as might be a fun addition as I don’t have a high end pc. so will be doing some reading on this too. 

How to Modify your GameCube to the Maximum

As i have just purchased a second hand GameCube. I have decided i am going to modify it to the maximum the using the latest mods form 2022 for my 2001  machine

Picoboot modification

So first up I have decided to look modifying one using the Raspberry pico method. There are some options to softmod but they are more costly as can only get the modified memory cards or action replay discs from the states. there are other methods but the cost of these are well over £170 i wont be doing this the methods i have chosen is £14 for a complete Raspberry Pico wires thermal pads memory card and heat sync. I haven’t accounted for solder and flux as i have them in abundance the SD2SP2 PRO adapters all from aliexpress. £3,99

So why would you want to do this well there are several reasons.

  1. To preserve your game collection by being able to back them up
  2. Allow you to play homebrew.
  3. Allow you to play games from other regions.
  4. allow you to run DVD-R discs (if you pot tune)

So as I was away relaxing in Florida I was searching eBay for cheap game cubes i brought 2 one that was modified with Picoboot and one standard box.

why 2 well sniped them both by mistake so will be making them the same and then shifting one back on eBay as need to rase founds for a fiber laser. please donate if you like my posts.

What you will need to teardown you GC

 you will need some special tools to open up a Nintendo product. In this case, you will need special 4.8 mm tool available of amazon


to open up the case you need to remove these 4 security screws from here onwards they are cross-head screws. see the image below.

you can now separate the shell.

Next up will need to remove the fan mechanism with 2 screws  and unplug the power cable. as you can see mine is very dirty so out with airgun to blow the dust away. these are second hand boxes after all all built around the 2000s

you will now need to remove the optical drive board from the base board this is done by removing the following screws. there is around 15 of them all the same length so as long as they all go back afterwards wont be a issue. have pictured below locations.

Put the drive mechanism to one side and time to install the picoboot mod

For the pico boot method, you will need the following.

  • Raspberry pi pico
  • 23 AWG wiring red black blue purple and orange approx 15 cm long lengths of each
  • Flux
  • Solder
  • Soldering iron
  • Thermal pads for chips
  • 3D printed bracket
  • Heat shrink

i brought this kit of ali express for a grand total of £14 with all the parts

Lets start to install the mod so back to the main board.

To do this mod you will need to remove the 6 screws holding the heat sync in place then rock the heat sync carefully as not to damage the board.

if the heat sync is not moving heat the machine up for 15 mins then will come easily with out damaging DA14 which is common if your not delicate with this.


you will now need to solider the wires to the correct place on the lower board. once this is done you will need to route them to the side of the GameCube. see below instructions my board is DOL-001 built in 2001

going to start with black jumping over the 2 pin headers.  Next will be the pink and the red wires, To Finish off will do the blue and the orange wires jobs done.  Now it add heat shrink and route them through the board now this is done will add some Kapton tape to help protect the wires  before re installing the heat sync. montage below

Now to flash the pico you can download the latest firmware here and how to install instructions as if you have dol-101 is different.

Lets get started on flashing plug usb in to pc and then   Hold down white button connect via usb drive will mount on pc can let go of white button now. next drag latest version of the firmware picoboot.uf2 over to the folder  drive will eject green light will come on your done as simple as that. now disconnect the pico and solder the corresponding pins. make sure you don’t have too much or too little wire 

Me being a perfectionist i found this bracket by zedlabz to install the Pico on my machine. as 2 mm 2 screws and bottom bolts to machine for a nice clean install

so over to prusa slicer to make it going to take a wapping12 mins To produce

time to reassemble the machine and make sure it boots.

Format your SD card to FAT32 or exFAT. Download the latest Swiss release from here and grab swiss_rXXXX.dol file, rename it to ipl.dol and copy to the root of your SD card.  it works nice and simple.

SD2SP2 & SD2SP2 PRO 2022 AND SD MEMORY CARDS

There are 3 current options on market for the GC depending on method of modifying will be how you if you were using a mod chip you would need dvd media to boot in to swiss. In the case of the picoboot you wont need the optical drive unless your booting games off it.

So will need a front end to boot in were as modchip will still mainly read from the drive and then boot off the sd.  

so your my options are the followng 

SD2SP2 micro sd card reader that hides behind behid the expattion port on the front of the machine willhave to remove port cover to access it easily.


SD2SP2 PRO this is simulare but had an exstention board so it can be accessed from the side of the game cube (this is the one i am going to use.)

Memory card SD reader in standard and Micro sd verisons

all pictured below.

Formatting SD Card (Important)

it has to be fat32 if you want some of the apps to work especialy home brew cheats saves etc. it gave me a headache for a few days till i did some testing. i am using a 256GB micro SD in the SD2SP2 card port the system will support bigger and when the prices drop will put a 1tb drive in there. I know were as the front loading memory cards can be a bit different. 

Card structure

Download the latest version swiss and then copy the .dol in to root folder you will need to renamed the to swiss_rXXX.dol to IPL.dol this will allow the system to boot in to swiss you can also launch other systems by naming them a, b, y and x .dol not tried this yet good for the homebrewer.


Using homebrew software

This is primarily why I built this machine as have a love for old school gaming

So have added the following SNES, NES, N64, Sega master system and Mega drive,  PC Engine and colecovision. there some others like PSX and scummMV that i will try come back to later

Key points:

You will need to install emulator.dol for each system in the correct Name folders

with in each folder you will need a roms folder and saves folder this will then

the SD Card needs to be formatted fat32

So far i have working the following systems.

  • N64
  • Sega master system
  • Sega mega drive
  • SNES
  • NES
  • Gameboy  and Gameboy colour
  • Gameboy advance
  • PC Engine

Backing up your games

This is done with very easily using CleanRip insert disc in drive turn GameCube launch app and follow on screen instructions about 30 mins later you will have a full back up on the sd card of your disc ready to launch through swiss. 

its not illegal o own back ups of your own games. its is how ever illegal to download them off the internet. unless the are now public domain for historical reasons. like a lot of old games are.

Pot tuning for burnt media

This step will need to be done for all methods methods  if your going to use burnt media as most GameCube wont allow you to use DVD-r or +.

to do this you will need  need a multimeter set to 2k ohms. 

Deepening on model will depend on what figures you should see GC is on. DOL-001 units are usually set somewhere between 450 – 600Ω while DOL-101 units will be a bit lower at around 150 – 250Ω so if the disc is not reading try raising it a bit. and try media again till it boots correctly. as show below.

fist you will need to take the shield off the media drive

just been probing my pot with multimeter and i am getting readings that are very off I have a DOL-001 unit i think it running a 101 drive as I am read 163 ohms so in theory I should be seeing between 450 and 600 ohms were as the model number with DOL-101 should see between 150 and 250 ohms

i know its not a DOL-101 machine as i have digital output.

so i am going to tune it up to 200ohms and see what happens.

Still not reading dvd-r could be my media I’m using does not matter as still reads original games so will do some experimenting with secondary unit.

Adding HDMI Support

there are a few different ways of doing this from cheap to really relay eye wateringly expensive. the holly grail would be the av out component cable costing around £200 followed by the eon HDMI output again around the £170 mark now as i doing this build on a budget I decided go cheap with a £5 cable from AliExpress this was less than impressive as was a cheap upscale washes out the screen hard to play with but good to get me started whilst i waited for more bits to arrieve

 I also invested in a £59.99 GC2HDMI Kaico Gamecube GC HDMI this is a AV plug in and play just doubled the scan lines this gave me true 521p output. the difference is incomparable but see below the images from both files. well worth medium outlay

Cheap cable image below on left hand image kaico on the right much better image.

Gameboy Card Cartridge reader addon

these are getting hard to find but as i found on sub £60 without software box or anything else I thought why not as I am going the full hog on this project i also invested in a multi game cart for fun. will also invest in a multi card for GBA as well for fun if it works.

I will be refebing the plastic on this pre modded game cube with retrobrite in another post just added the game boy addon to see it in action wilse i was waiting on parts.

But there’s no software with well homebrew will take care of this with GBI homebrew interface which works like a charm perfect addition for  my game cube. 

Broadband adapter

So this was  only used for one game in total but can now be used for uploading to the game cube remotely thought this might aid with the project well when i can find one for reasonable money.

i have put this hear to talk about the theory of what it can do till i have my hands on one think i will be going to some retro games shows.