Hi every one just about to get my mods underway on the 50watt laser
I ordered a lens kit and its some were between USA and UK
have the ultmate air assist ready to install.
just need to pick up a 50L silent compressor some fitments and should be ready for next project.
the good news is I am cancer-free and I am also covid and lung infection-free to just resting up before I get on fully with projects, I am also waiting on dell to rebuild my laptop.
yes i know was a ruff month for me but back time to make stuff and be merry.
looking for a good deal on a compressor and also looking for a dust extractor as well for the cnc machine.
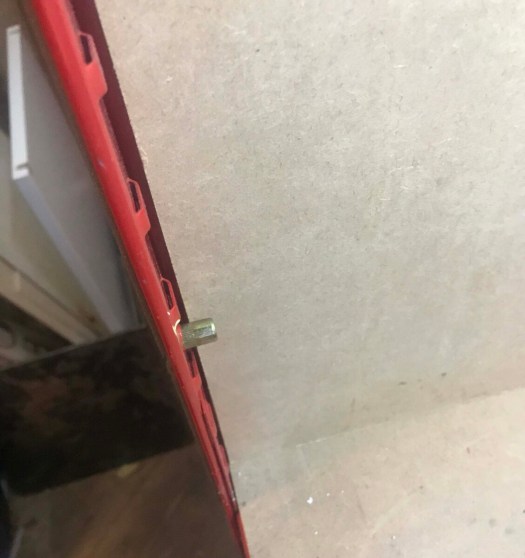
Being on Facebook I was helping someone and was told my lens should be the other way up now I have tested this but still not 100% sure I am right.
the principle cuve should be up on laser well mine is down.
so I modified some ones cut test file and ran it in both orations
modified file.
The result I know I shouldn’t be down the cave and suffered afterwards but as you can see the orientation cut better with lens down power was set at 70% which is my laser max point. I then used the power scale function on light burn to run thought different power percentage. however i am yet to see if focal point has moved due to the lens being rotated. that will be my next test but need to get better.
not sure as looks like focal point has moved i might do a ramp test.
so next I am going to design or borrow a ramp test to see if the focal point has moved. with the lens being reversed as this intriguing me. as anyone who knows me knows my mind is always active.
Update 1
I have ordered a lens kit so now 38.1mm 50.8mm and 63.5 lenses with alignment tool from American Photonics should be he in the next week or so will do some testing with that when it comes. will review it properly so far am impressed with customer services it’s on the route from the USA to our small island. see how much import tax I have to pay.
update 2
currently designing a ramp test as want something i can do in 1 pass and replace the ramp after
Has been a tough month for me i was working in the cave doing the Christmas gifts for friends and family when i developed bad back pain, I thought I pulled something,
Called the 111 non emergency number ended up in an ambience trip to the hospital.
They discovered I had a very bad chest infection. During my stay, I contracted Covid-19 that has I am now covid-19 free but awaiting another operation.
So I will resume doing stuff soon and the rebrand but banned from the mancave doctors orders for 2 to 3 weeks.
going to recover and make 2021 a busier and better year.
sorry for the lack of posts i have been woking on getting some bits done but day jobs
taken president again will hopeful doing some new bits soon. as work sleep repeat is what it’s feeling like ATM but will hopefully get back to my daily blogs soon.
still got printers to fix testing out new air assist for the 50w over the next few days.
As we are working remotly from our holiday rental property i have been teaching my self a new skill as you know me i love to learn stuff and the lack of other tools here.
So went in 50/50 with the wife on an embroidery machine. so been learning how to do designs for it as a new skill to learn. its a completely different way of doing stuff but a fun learning curve.
One day might relocate the cave to wales at some point in the future as would have the space for more equipment and do more projects.
Sorry for not posting for a while been in wales for a few weeks going to be staying down longer as got things that i have to fix in the house and other bit. dont i will be back in 3 weeks for more fun with cnc 3d printing and laser cutting also now teaching my self embroidery so will be doing some fun things with that.
i am going to be with my arcade machine i am going to start stripping it back for the mane conversion project i have in mind. so will be posting some updates.
had an old HP Proliant 350ML G6 kicking around the office we have upgraded to a new server its got a 1.2 tb raid installed and had 5 x spare pair SATA ports. As we are still in lockdown i decided to make the ultimate server on a budget.
you can pick this server up fro around £150 on eBay complete. it was running 16gb of ram and 2.15 GHz processor with 4 core processor. and had a spare port for the second CPU.
I had to buy a second hand mother board due to me damaging second CPU socket and killing the monther board £30 for one shipped with 24gb of memory with it.
I also removed DVD drive to give me 1 extra SATA port for a SSD
on eBay, i picked up 2 x matched CPU 2.56 and 9 rams 4gb DIMMs for around £65 i picked up a GTX 1050 GPU and sound card for around £160 salvaged a 4 port USB card. i was going to use some old 2tb drives out of a raid server but when i the disk performed health check was getting some errors so decided as this project is sponsored by my company would invest in some NAS 4tb drives £104 each so got 5 one will act as a parity drive. also using a 500gb SSD for cache drive files. oh and extra fan for missing CPU slot and fan baffle for £36
i have also added ordered 2 matched six core cpu 3.05 Ghz maxing out the board for £40 will upgrade them when they arrive as coming from asia.
So all in if had brought it from the net i would be in under £1000. 16tb server with 60gb of ram 4 Gb GPU.
the hardware went together very easily i started off by fitting memory to the second processor DIMM slots. i then fitted changed out the first CPU and added the second one. do love big towers only got 2 cuts from heat sink and frame.
All came today and all installed looking nice and full inside the case build is all done. just fits thankfully a little tight in areas. but looking good.
now to turn on V-rt so i can use pass through tech and turn on some other features.
Setting up Unraid got 32gb USB flash drive download installer and flash drive plug it into a USB slot. In my case, the motherboard had an internal USB slot then on boot get into the bios and change boot order i did USB, CD and HD. the system will then boot USB first.
first boot takes a few mins you are greeted with the login screen. the user name is root password is blank.
you are then greeted with a register for trial or buy screen click trial.
would recommend adding community app plugin there are lots of guides on this but basically you to unraid web site and look in the footer for apps store and look for plugin url then go to add the plugin and then past it there a few seconds later all installed.
next up you going to need to build an array in my case its 5 drives, 4 for data and one parity drive for back up just in case one drive fails .
next up is adding services and some virtual machines going to be running Windows 10 and Ubuntu desktop 20.4.
First you will need to enable the array and set dockers going. would recommend looking on you tube space invader one seems to have some good tutorials.
I am currently clearing down 2 TB drive so i can make a back up of business array then will have an off-site backup as well as the current live version. this will live sync every day.
so far i am impressed with the unraid system couple of glitches but stable.
Starting to get things working.
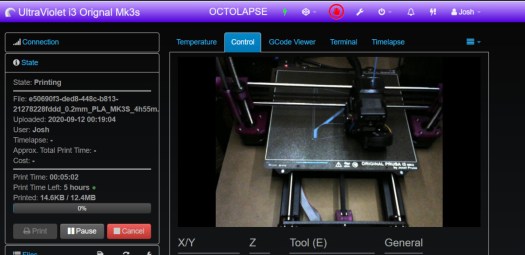
Will update this project as i add to it. have set an octofarm server going and its also managing all the house entertainment. looking at other addons as well. have set up OpenVPN so i can tunnel into the server work from it remotely have 3 virtual machines running. processor seam so working ok till i get the extra 4 cores going 12 cores 24 threads but that’s a few weeks off.
going to be out of London for a week hoping to get one more project done before i leave as have also been running it back to back with wast board. but might break it into two parts as 3d printing side done but now going to work on making some aluminium clamps with fusion 360 and CNC machine. this is a new idea so as going to be in deepest darkest wales will use spare time to teach myself manufacturing.
Will post the 3D brackets project tomorrow or Saturday.
New day new project after having a few failures due to double-sided carpet tape failing to hold bits down I have decided to modify my sacrificial board. saw someone do this on a youtube video so i have decided to make my own.
The Idea
Now as the board is bigger than max dims of the milling machine I am going to have to take some true measurements of limits of the machine. As the size of my sheet in the program.
I have these hammer in M5 t-nuts about 100 of them that brought a while back for this project. But then realized that the bed was smaller and my original plan would not work.
So I know the board size is 300 x 400 well according to the manufacture. the wasteboard is actually sized as 380 x 550. Now to home the machine then figured out limits. In mach3 start off by homing all then zeroed X & Y. I then moved y and x to there limits and noted down the size in my case this was 227.6 x 387 so this is the material size. There is an extra 20 mm in x and y if I wanted as soft limits stop 10mm from each axis but happy with that as gives me room. Now on to the design side.
The design
This is double-sided job and my first attempt at one. So the first side is top side so going to my resurfacing tool to do a pass at .5mm as I know nothing has cut in that deep in the past. it will then do the edge bit
Then next up going to make a grid that is 25mm squares each square corner will have 6mm hole in it for bolt holes. To going to use v-bit to make grid followed by 6mm end mill to make holes the will stop 1.5 mm shy of the bottom of the board.
Side 1
Side 2 will have 17mm x 1,5mm deep circles over the holes to allow for the nut holders to be recessed into the wood.
Side 2
the rendered model looks a lot better.
side 1 rendered. i have lessened the grid depthSide 2 renderd.
The process
I have already drilled 4 holes in the board to hold it in place i need to still get some shorter bolts and counter sink the nuts but that will be done after i have run the program
Side 1
This is going to be a 3 tool change process. we are going to start with 22 mm surfacing bit to a depth of 0.5mm to clean off any damage done to board it will then run around the edge of the board, the second pass will be drill function using 6 mm end mill. Finally will run v bit to make the grove grid. and outer border.
Side 2
One pass 6 mm end mill and the job is done. this pass will cut 1.5 mm depth 17 mm diameter circle so the trended inserts can be countersunk.
Running the program
Side 1
So first up the skim. in with my surfacing tool and time to zero it. do love the z probe script written by Charlie look at my review on the CNC machine for more details. right all set up to go have no idea on speeds and feeds on this. ok first and the second attempt failed miserably think i know why my rpm was far too slow so gave up for the night. new day new vigour lol did some light reading overnight and found my Spindle will go up to 24000 rpm i was running way slow for bit size so have adjusted tool to 18000 rpm from 1800 will try this again today.
Ok i am dumb i have miss calculated the size of material doh re-run the edges then hit the soft limits so did some recalculations and then rehashed my board completely.
Luckily being CNC no damage done so the board adjusted the gcode and off again i went with the board skimming. so process 1 ended up as 3 processes dont worry have made adjustments to the master files.
Some pictures of the resurfacing process. in process.
Away we go.
doh size is wrong
Resized to to proper dimentions
dam it it soft limits
Right 0.5 mm down and done only 3 more processes to run and we are done.
The re designed board:
Side 1 redesigned.Side 2 re designed
Next up the grid. so out with the 30 mm surface tool. in with the v bit and time to zero the tool.
V-bot away
think i need to work on speeds and feeds as very slow.
All done for tonight need to hover it but thats tommorow.
right holes tomorrow and then time to flip the board. hopefully will line up not sure if i should enlarge cut out just as the flip is the unknown hopefully will work out
Now to swap tools and put the end mill in and zero the tool. before running the 98 holes that need cutting. all ready for me to press start later. as the son had his nap got vacuum over the baseboard.
cleaned and ready to drill.
Disaster forgot to enable the spindle when on a destructive path gouging through grid i then reset but it had moved waste board and then ended up drilling through the bed in 2 places destroying 6mm endmill in process. managed to save it by flipping board so going to start again and not be so tired when playing with CNC machines.
Redone first 3 stages now for the flip going to finish off by drilling manual thought 2 halves as not to risk damage.
drilling done.side 1 done.
Back on track and only another evening to waste on the board cnc humour.
continuing on with 6 mm end mill so no need to zero the tool final run of the cnc machine for this project. Well, i thought that was going to be the case but no i was wrong.
going to be glad to see the back of this project lol.
Right, this has gone a little wired on me as most of the circle are circle but some are not i think its to do with the soft limits stopping the bit from moving i think i am going to have t rethink side 2 of the board. Depth has not penetrated the holes so going to have to drill each one manually. oh and final fuck up they are not central to where i drill through the board.
So back to program and time to rethink design. the joys of doing things your self lol ill be worth it in the long run though lol. going to skim the board by 1.5 mm and then should be able to finish off machining of the board. I hope.
side 2 remixed for the 3rd time
will run that tomorrow as had enough tonight and it is 1 am again one day i will go to bed early. its a curse.
Another day first up out with an electric drill and six mill drill 98 holes to do drilled and now am going bolt the board down and run the skim and dam it, I have miscalculated the skim by 0.25 mm so time to modify the program. and run it again went well till dust shoe dropped had to kill the cut 20mm from the end of the run. Right enough is enough mach 3 g-code editing here we go figure out where it turns to run the last side edited the code to start there and away it went job done.
all skimmed ready for t nuts.front re done
98 t-nuts to hammer in to the wast board and its done.
can see the damage it di in the first run and the skim i had to do and now hammer time.all hammerd in now to flip it hope none fall out and mount it back on the bed.
The finished item only took week to run in the end all a good learning curve as most projects are already thought of my next project for the machine just need to get some aluminum and some M5 screws. also going to make some 3d printed ones as well.
all done at last.
Now to make some clamps over to fusion 360 to make my own as don’t want to spend out when i can design and make it my self metal and plastic
So that will be then next project should have 3d printed side done buy end of the week. that will be part one part 2 will be me teaching my self fusion 360 manufacturing.
Started stripping out the old hardware going to use a perspex window mounded to the unit with some flat head threaded rivets. Screw knobs 6 on the big window. then going to buy a A3 sheet if perspex and drill the 2 corners and cut a window out of the tool end with the same side panel but hinged on the top end. with to thumb knobs.
going to find some brackets to print to make the enclosure more scure.
will make sense when you see it.
Still not sure if i need a better dust collector going to get a mask as mdf is nasty stuff.
Going to re-run line vacuum line as it pulling the board also going to look at 65 mm dust shoe. to print.
But will work on that going to mount a camera on the outside of the enclosure looking in as the go pro went flat on me last night. then should be able to get good footage.
will start the documenting of it all tomorrow.
Starting to look at doing some fun stuff think i will get some hard woods to play with.
started looking at some dust shoes last night found one i realy liked the look of but its missing the brush part of the shoe. lots of people asking designer for it. no responce unlike most people who would just find another one. i desided to remix it with the brush attachment.
So pulled stl in to fusion 360 i then used it to reffrence shape and made the rest as i whent looks nice now to test it so first job of the day when i get to the man cave is to load the printer with some Petg and print this out.
the part i designed is in grey on the image below.
bit in gray is what i designed as was missin from downloaddivits are for 6 x 2 magnets
I also made a inlay for brush strip to be inserted.
now to print it all
Just waiting on the wife to wake up from her sat morning lie in and will put some petg on the printer and start the print looks nice and compact so hoping will be more effective than the last shoe. as was a little bulky also means i can leave brush off and show you the cutting in action. as just held on with magnets. more later.
first part done now to test fit before i go any further.
First part printed will test fit it in a short while need to still dial in the other printer would be doing this with both running.
fits like a glove will now print the cavity part back in 4 hrs if i am still up and then will do the final part the bit i made and hopefully it all fits together. by tommorow will have a working dust shoe so far its nice and compact need to find some brush for it as mine is too big.
after diner will mark drill and make large observation window and make a mock-up for tool change window. then going to fire up my birthday present from wife a mini router and cut the window out that will probably be tomorrow if time allows. will then order some 4 mm A3 perspex and do i attempt to print my own hinges, hmm maybe i will to save some money.
also going to look for a enclosure camera mount or something that will suite my application.
So a bit of graft with some research more later
Ok! I sat down mistake I know just printing tonight will get this one off the bed then i will get the next one printing so by morning i should have a working prototype now to look for brush for the shoe.
second part done
Right 10 min cool down and will go remove it from the bed and start on the last part hopefully will all fit together.
away we go night all back tomorrow for more fun.
from design to production in less than a day do love 3d printing.
Morning all well afternoon had a lie in this morning was a late one. but parts are finished off. Will go down and see it fits before i apply the magnets as i have limited supply.
Just need to do a test fit. and find some brush. in fact that what i am going to do now.
It fits like a glove going to make a custom brush for it shortly might cut a broom down and hot glue gun the bristles in place.
Perfect fit now to add metal and magnets
underside
will post remix shortly on Thingiverse and make public will post more images shortly once done hoping to do more on the enclosure later.
to make the above you will the following parts off Thingiverse.
Right Fitted the hardware and magnets have fitted it to spindle works well and is nice and compact has great suction too. just need to make the brush up next. not sure the best way to do this might buy a roll of PVC door blind material 2mm. and cut it down then make slits all around for brush part. limits are spot on got to love fusion 360 love my hobby licences free to makers and such a powerful tool i still need to do a course on it and learn its full potential.
Hardware and magnets inserted no need for glue limits spot on.fits like a glovezoomed out shot will do test tomorrow
Have started to drill holes for rivets i will then drill 2 fixing holes and mount perspex on to thumbscrews will drill these holes slightly bigger as gives me movement after i have drilled it then will drill a further 4 holes to racking so six screws in total. Drill batteries went flat waiting for a charge. before i mark and drill other holes.
2 holes drilled 4 to go then rivet time.
Think i will then move the suction hole to the top of enclosure might cut vacuum hose using 40 mm pipework to run a cleaner line to vacuum. going to do a test cut and see how it performs now with the different shoe.
Going to do that tomorrow as getting late again. will take a couple more shots later when i go take the battery off charge.
2 rivets in the hole just need to squish them need to change the head from 3 mm to 6 mm might actually do all the 3 mm holes first so i can then just concentrate on the 6 mm.
time to sleep back tommoorow.
Right been working on a day job in the man cave but have had time to drill and rivet all the side access holes.
I am going to get some cheap opaque 4 mm perspex from the local DIY store. and some insulation foam tape to stop dust coming out.
But that will be tomorrow as will be going out to the office. so will stop on my way back.
found a sacrificial broom to cut the bristles out of and glue into the shoe well that’s if i can get it to fit. The plan is to cut each bristle in 2 and put masking tape around the middle to holder them together till glued.
Will post images later. Going to run test cut tonight need to do some side projects for a friends gift but won’t cover that just in case he sees it.
Test run worked well wow the cave heats up and the vacuum is very noisy might have to see how to get a quieter vaccum.
Away way we go going with less dept and and more speed.
It turned out well going to need to do some minor sanding then to paint it.
all v bit cuts done just end mill pass to run
Just need to run the cut out pass but will that tomorrow happy with my progress going to get some different woods to play and some aluminum.
New 4 axis mpg.
Managed to install new MPG had some issue installing as it was not quite registering as in showed up on the PC but wouldn’t move. was about to send a shitty email to the ebay seller but. held off i consolted google and came up a blank i then remember last one dident like usb 3.0 plugs so I tried that. it then worked i will now to set up the macros as then can press button to do actions.
Did find a video on adding custom macros as want as the system uses it uses its own z prob script. the video showed how to get the mpg to work with 3rd party macros. to add z probe function and a few others. so i will start making a list of macros to add to the mpg. that might be a job of the day as the weather is not on my side today.
Will be going to the local hardware store later for some perspex and wood later. i managed to mark out the base board for its window cut out if the rain lets up later will cut it out when my son has is nap. as then can start putting things together. ready for perspex sheeting later.
little hard to see pencil marks but theirs a window there this is for quick access for changing tools.
right i will update more later if i can get it cut out today. the sun came out and the son finally slept window is now cut now to wake the boy.
Tool change window. now to seal it all up and make it dust proof it.
Tonight will screw it all together and make it as dust proof as possible. more later on this.
back from DIY store, i couldn’t get any perspex so got a sheet of 6 mm MDF will make it out of that for time being COVID-19 limited supply’s.
have marked it up ready to cut sheet down and add holes and rivets then will use foam backed tape to act as a gasket, will then use 3 x M6 screw knobs to hold sheet in place.
Cut the sheet down using my bosh multi tool cut though the MDF like butter. The MDF is temporary till i can get perspex. The joys of covid-19. i then drilled the fixing holes for the panel i then held up the MDF in position. I marked thorough the drill hole on the mdf. i then drilled the marked hole. I then fitted first flat rivet in the hole and fixed it in place with the rivet gun. then placed the MDF back ant attached it using the plastic M6 knob. I then marked up the renaming 2 holes. I then drilled them both and applied rivets to both holes.
New tool door quick access.
I then attached 6 mm insulation tape all around the window to stop dust escaping
lots of foam tape to help dust escaping.
I have also attached cabinet edge blocks through the enclosure to seal it up. need to get some more duct tape to seal to the racking.
its nice and snug
will take some pictures shortly but happy with it so far just need to play some more the system i think I might get a 1m hover extension pipe so it can be plugged in and out.
will measure that tomorrow and have a look at options.
have reprogrammed the mpg script so my z zeroing prob will now work on the mpg just need to figure out what custom macros i am going to install to it.
and it works liking this.
with to door off it gives great access to the front with 3 turn screws about 3 turns to release front and six to do the sides.
door open
I have a few bits to add to this project but they can be done as when i will update and post.


You must be logged in to post a comment.