

Be warned if you’re in the UK import tax is killer on USA imports atm. For mirrors and lens cutting head and the motorized bed had to pay a further £80 in tax.
You will need a cheap pump for this paid £15 for one-off amazon.
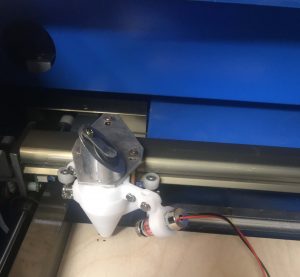
Removal of the old cutting head in my case just twisted and it came apart. Removed old cutting head.

Added new mirror and lens to light object cutting head and reinstalled.
Change other 2 mirrors as easy to remove and change you just need to unscrew the cover and replace with the new mirror.
Then realigned the mirrors for the new set up.
Took 2 weeks in the end to align lens and mirrors this was my own fault as I had used an angle girder to cut down my exhaust it had vibrated all mirrors out of alignment loosen mirror mounts. I managed to bring it in from the man cave as son and wife were having some time with family in Wales. The joys of dad life and before you ask I wouldn’t change it for the world.

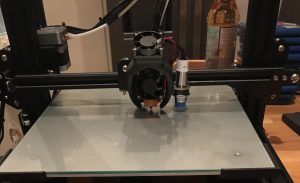
Next up I installed the cable chain I brought off Amazon, to hold this on I used 2 cable ties through the laser carriage and shortened the other end of the chain I then stuck the other end down with 3M double sided foam tape. I then run the silicon tube for air assist. in to control box part f the printer, there is a spare hole at the back of the enclosure I ran the silicon tubing through there.
i then have attached pump which is plugged into the mains i will be making this controllable of my custom control panel once i get some time to build it so probably over the next few weeks.

as i know the workings of this printer runs off 24 and 5 v i opted to get a set of 5v led M3 light tape 200cm white. i ran this around the inside of the enclosure and then through in to the control box area of the laser. i will be adding a on off switch to my custom control panel via a 5v power supply to control lights and laser focus tool
i will be adding laser focus tool soon i will also run the wiring for the cable through the chain at some point in the future.
Have more to add soon just posting in dribs and drabs as and when i have time to do stuff.


You must be logged in to post a comment.