
Will it improve its printing ability? or will it be an expensive mistake?
This project is going to kill or make my CR10 v1. The story so far :
2017 Received the machine from Aliexpress Creality store.
IT worked out the box did some big prints suffered from ringing kept vibrating off level suffered form glitches and so the story begins
brought the duel z modification less ringing started to get the hump with the board shaking the leaving screws lose. so decided to get the EZABL prob kit brought it got it all set up worked great had a major meltdown and destroyed itself with mass blob filament could not unclog it so I brought a complete extruder. took months to arrive. I disassembled the machine and put it in the attic.
meanwhile, I kept on using the Prusa mk2 that I keep on upgrading to the latest spec so forgot about the cr10.
Lockdown happened health workers needed PPE to save lives I joined a group of people making ppe. I started my print farm going 2 Prusa around the clock pumped out face masks ruffly printing 25 masks a day. but wanted to help more
brainwave I got that cr10 in the attic I can fix it as now 100 times more confident with repairing machines. So fixed the cr10 added silicon bed heater with SSR 1 good print out of my machine then for some reason the bed temp was reading very high in the 800c back in the attic went for another year have moved all business servers in the house so needed the space back so brought the cr 10 back down and put it in the workshop,
since then I have sworn at it a lot as keep tripping over and finally decided enough was enough swapped thermistor as thought that was the issue. it was but wasn’t, I finally figured out that it was the gunked connector in the control box that was that actual issue. fixed it after soldering a new connector into the plug on the box.
After a binge on Ali express and some more local parts, I’m going to modify the F#%k out of it and hopefully not go down in flames.
Let’s get this done.
I am going to lose the EZabl probe as has intermittent issues and the upgrade to a BL touch will mean that the EZout is no longer needed.
So thanks to the 3dprintingkid. I have been armed with a brand new ender pro 1.1.4 mainboard which I will be flashing with the BL Touch upgrade kit and latest Creality firmware. It’s already been flashed with a merlin 2.0x but going to go with the Crealitys version for the time being to see how it performs. if not will make my own compiled version.
So I will then have hopefully reliable levelling probe. next, I will be losing the Boden tube extruder for a direct dual drive upgrade off amazon with some belt tensioners being installed and proper z-axis motor mounts aluminium. I am going to upgrade the 8mm rods with some proper anti-backlash nuts.
Then it will give it a test whilst I wait for the next batch of upgrades to arrive from china within 10 days according to aliexpress.
So we are going to get a custom bed chassis, with an Upgraded Y-axis motor bracket.
then I will upgrade X-axis and Z-axis with a linear rails upgrade kit.
Finally, on to the frame, I will fit a stiffening kit and adjustable z rod holders with bearings.
Well, that’s the modification of the parts done. if they all work will be time to do some 3d printed upgrades.
Time to start.
Time to strip the machine down and swap out the old mainboard ready for the flash update. so first of all I have swapped over the cables and connectors from one board to another.

Cables swapped 
New board in
now to remove the old board from the machine. now to bolt the new board in the machine.

Off with old EZABL 
Time to remove the ideler 
Making a collection of parts off the machine. 
Time to remove the extruder 
Extruder motor gone. 
Exstruder removed
I will also loosen the y and x-axis belts and remove idlers ready for new ones. then will remove the extruder and extruder motor and PETG tubing. So I will be ready for the parts to arrive tomorrow.
A new day and a bit of a build ahead well once Amazon has delivered.
Got the first batch of updates,

First up going to replace Y-axis tensioner with nice solid construction easy to fit.
Fitted and tenctioned 
Solid construct
next up time to install the new extruder drirect drive kit.

Ajusted and fitted the new direct drive 
Had to remove 5mm off the capricon pteg tube. 
Exstruder now filts and can be screw down. 
Time to fit the cover and Braket 
BL touch Bracet installed just need to fit the sensor. 
Time to install the wiring.
Right next up to add the X-axis tensioner again solid construction the supplied screws are too long luckily had some M4 x 10mm screws kicking around nice snug fit.
Going to change the motor mounts as they are easier to fit 4 screws each and done much neater.

Old motor mount 
New motor mount and anit backlash
I installed a clone bltouch that didn’t work very well have been waiting on parts to continue the project. kept on crashing into the bed so ordered the official one from Creality
a week on and have most of the upgrades so now time to fit them all first up going to do the x-axis with linear rails. you can find the kit here have to take off my newly installed extruder and add the new rails.

Exstruder stripped off 
time to add the brakets 
now to add the rail. 
now to refit the extruder
That was very easy to do next up is the bracket on the extruder. it doesn’t fit what the F%&k I ordered the cr-10 v2 must have a different head on it. time to modify and make it work! if not will have to bite the bullet and order the correct one so out with my needle files and time to lengthen the hole. well 30 mins later now fits. but then the probe mounts don’t fit right. ok solved that put the bracket on first then nudged it over then the cover fits so looks like it will work I am now going to wire the official BL touch kit. won’t fit it yet as need to remove the x gantry to fit the z linear kit.

lets strip everything off to fit the braket 
all ready 
it dont fing fit argh 
finger file to the modify the part 
fits perfectly now 
and i think its straight. 
all back together ready for bltouch
the one thing I will say about fitting all these parts is there are no instructions just wish that aliexpress manufactures would think about this as would make life easier for us end users.

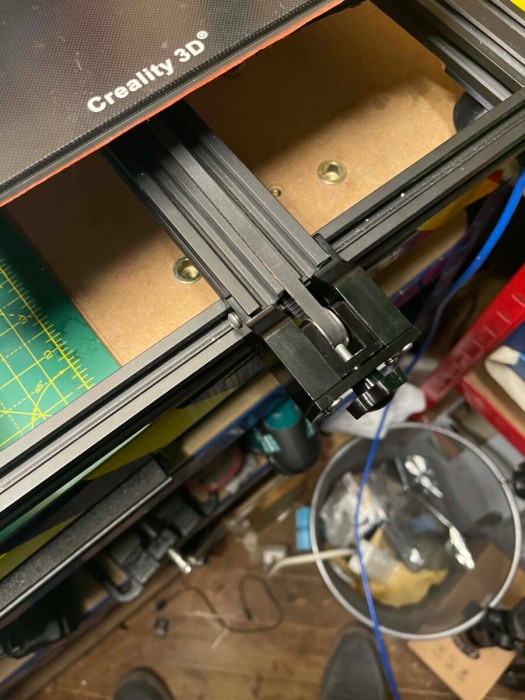
time to strip down the z-axis and liberate it from the machine then to install the left and right z rail all fitted and now to rebuild x-axis with new brackets. the machine is starting to come together just need to fit the extruder.


had to rotate x motor to get it to fit with the bracket supplied. next up I fitted some side struts for rigidity lets see if they help. can find the struts kit here

I just need to fit the BL touch and then do some cable management.

nice offical kit. 
all fited 
cable managment sorted 
had to find screws as non provided for the exstruder 
all done ready to flash.
ok now to flash the firmware with Creality ISPprog.exe all done time test. lets do a auto home. argh, mods not allowing me to hit the end stop time for some mods some m3 nuts will act as spacers for the motor mount now works, as with any project some times just need to think out of the box.

Right auto home x and y hitting wait a moment I have no z oh I see flashed it with standard merlin. Reflashed and all works had some binding issues with z that I have fixed by adjusting the threaded rod screws and my trust spirit level.


Now to offset z so we can start to test what the mods have done for this machine and will I be doing further mods let see quite nervous about the first print.
final bits to install z rod ends are now installed.

time to find a sheet of paper and see if my machine calibrates ok fingers crossed.
away we go auto home done over to Prepare menu then » Move Axis » Move Z now to lower the z till it grabs the paper and then make note of the amount and then go over to
In my case it’s -01.50 go up to the main menu then go Control » Motion » Z Offset enters —01.50 time to store the offset.
go back to the Control menu, then select Store Settings. The job is done now to test print
Failure of the bog-standard Creality firmware 1.60 has issues I think the printer is heating auto homing then going through the bed levelling part then it starts to extrude and rocks backwards and forward on the front of the bed. hmmm
F@@K it 8bit Creality board can go do one time to spend some money as I said going to throw upgrades at the printer till it works right.
Have ordered bigtreetech skr mini e3 v2 with TFT screen so will be compiling my own version of marlin for my 32bit board.
I think I will also swap to linear rails kit for Y-axis I might just sell on the custom bed as the kit comes with all the parts including the bed.
so I am going to end this here till I have the new mainboard and can make some progress.

more to follow.
