
this has been a bigger build than I first expected around 100 hrs of printing a lot of remixing was involved so some things worked some things I have had to print again and again till correct. think they are all correct now as they fit for me.
As will any project files they are a work in progress. still need to reprint final fixes to test but the current design work with some drilling or being an angel so no rush for me. i would say there are a good few days of printing involved with this project. but well worth it.
So what this part covers:
- All in one Cr-10 Remixed for Dual Y-Axis linear rails kit
- UPS 12v big tree tech
- Filament runout sensor big tree tech
- Modifing TFT screen firmware.
- Dragon Hotend and issue correction
- BISQU Flexplate
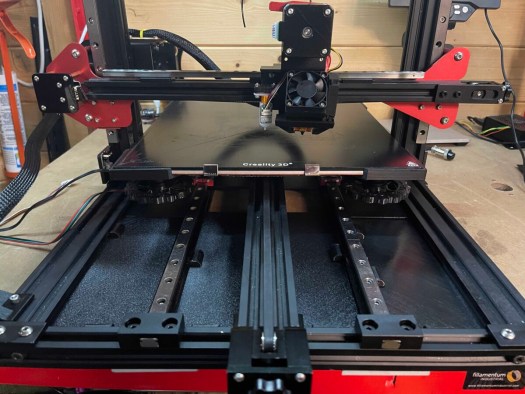
All in one Cr-10 Remixed for Dual Y-Axis linear rails kit
This is a remix of this design by Cornely_Cool can find the original design here. you will need these files for some of the builds my remix replaces the front-rear panels front left panel and several of the base plate files. this is a work in progress it works for me as of me writing this blog post.
The link to the files can be found here.
So why am I doing this the original printed mod I built-in part 3 or 4 doesn’t work with the upgraded linear rails so It doesn’t fit so going to make something using an existing design with a remixed twist as its not 100 % right for me due to the dual linear rails and the design wasn’t using SSR and some other bits. First up going to salvage parts and order up some metal work going to raise the machine 60mm and have another 70 hrs of printing ahead of me first up parts. needed some aluminium 2020 and 2040 some connectors to hold it all together some corner plates and some new rubber feet as I disposed of my original feet from my cr10 also have hight clearance is an issue with a shed roof. might still need to lower racking. have also ordered a small 5v 3amp PSU to internally power the pi that’s running the printer. as this is a custom build have also ordered some aviation plugs to tidy up the wiring and install better-suited wiring. I will have a sonsoff switch as master power on and off and use relays to turn on and off power and lights for web camera. I will publish a full shopping list. end of the post when I have calculated what I used and what you will need. will add build of material
Time to start the remix so starting with the base panels going to remix the Mosfet panel as don’t use one as running a silicon heat bed. so will house SSR relay, a 2 channel 5v relay for lights and printer and UPS board if and when it all shows up.
this is done using the panel as a reference and using PCB footprint diagrams have added a 6mm standoff for each part.

Next up I am going to remix the raspberry pi and pi PSU plate as I am going to use a hard-wired PSU 5v 3A so will need to make some mount holes for the PSU but first going to test its powerful enough. as I don’t have a reference diagram going to photograph the underside of the PSU and measure it using it as a reference image. will then trace holes for mount. won’t print it till I have tested PSU. have made some air vents and bars so i can make holes to mount it when it’s done.

The final modification is to the mainboard fixing plate so used the existing plate as a reference for size then added footprint overlay to trace holes for mounts.


the final hurdle was going to print the massive PSU plate on the cave monster cr-10 but due to wiring snagging I cannot print on it so into Prusa slicer have cut it in 2 will print half and half on both the Prusa so I can do it in half the time will line up and glue the halves together.


Now that I have remixed all required base plates now I am going to centre the middle post I have remixed the font panels to be blank as due to the dual linear kit I cannot fit a front-mounted screen. so going to remake the panels to smaller and more central with a 5mm notch to allow for fixing plates.

Next, up is the power plug panel got to notch this and move the power connector as it’s right in the way of the plate.


The last panel was modified for screen cables for mounting to the frame.
Time to start printing I am going to run it all in PETG. time for some overnight parts I am going to set my Prusa’s going shame I haven’t reinstalled Octofarm to run this but will do on the next build as will be running 3 printers in it. About 4 days in now all printed apart from pi and PSU mount that’s currently running and some fixing brackets. time to build the base has been tweaked the construction of the metalwork with some extra brackets to make sure this going to the stable with the printer on top of it.

Oh wait fan director last 8hr print that’s overnight parts for as I am already deep in assembly.

Time to build it.
Time to put it all together for the final time hopefully and I can then put a pin on this machine.
first up assembled outer frame with base runners and corner plates with the feet i have brought. will bolt down the centre rail once I have centred it on the base plates.


now I have a squared base I will add the uprights and bolt them down with the L brackets i have sanded the tabs on the printed walls so starting from 2040 I placed the first part I then added a bit of 2020 in the middle and continued on till all the walls was installed then using 2040 plates i bolted the base to the 2020 uprights. I will add another bracket on top of this to secure the printer to the base.


now on to the base panels, I will place them loose before I add the fixing clips in place.

dry fitting panels.


all my components line up perfectly well almost but still bolts down sold just need to adjust the centres slightly as the footprint diagram I found is wrong on the relay. I am getting better with each project build. now everything is in place have added the clips have bolted down all the components apart from PSU as need to modify it for the upgraded fan.

Final version the pi & PSU plate is done holes are wrong but I just drilled new ones and screwed it down with some 6mm M3 bolts I will start wiring up tonight.
actually going to need cable management. so time to fire up the Prusa 1 more time for a plate of connectors.

The wiring
First up will run the mains wiring from the 3 pin kettle connector to the Sonoff switch then across the on/off switch for the pi PSU and the main printer PSU. now I have the main power in.

Next, I will run negative connections for the 2 channel relay and link the relay to the pi so I can control it via Octoprint. I will then run the positive to the PSU and lights circuit for the web camera. next up are the jumpers from relay to the raspberry pi going to use 5v ground gpio 23 and 24 pins I am also going to use 3.3v and pin 9 ground and pin 14 for a temperature sensor inside the enclosure so I can adjust the fan if it gets too hot inside.
Ok, my worries about the mini PSU and voltage is fine there is no under-voltage which is great as sometimes things are not what they are advertised as.
time to pull out the wiring diagram for the mainboard.

end stops and motor connecotrs are wired board side got to do some soldering but will cover that later as need to make some new wires for the heat bed and y-axis.
I am actually going to modify one of the front panels to house a Micro sd card reader and a fan speed controller PCB so back into fusion 360 going to add foot block and add 2 3mm holes to mount the front 2 PCB holes as then in the main plate I will add an 8mm hole for the potentiometer. then over the other side of the panel, I am going to cut a hole for the sd card reader to squeeze into I will then fix it with hot glue. as the original design used a USB switch to allow for firmware update the skr board only allows for MicroSD upgrade so as the board is going to be embedded this will allow for firmware upgrades in the future.. this will be a 4 hr print I think. as I test fitted the 2 halves I needed to reprint this anyway as it’s off by 10mm so now will fit perfectly under the front plate support
So out with the callipers, I go to make everything will fit and is sized correctly. time to modify the sketch.

will do an overnight prototype print. well, morning has come and yes everything fits fine just need to screw the PCB down and hot glue the sd card extension in place and we are a bit of sanding for the tabs and should be good to fit. note to self make sure you sand the tabs another 3 hrs print and will defently resand the front panel as snapped a tab these things happen when prototyping but its starting to take shape.

whilst I’m at it going to add 10mm space on the rear power panel as it was very tight prefer there is some wiggle space more airflow as well going print it on ultraviolet tonight back on with the assembly tomorrow.

All panels are now fitted going to cut myself an aviation plug holder jig. so out with a sheet of acrylic time to cut and bolt together.
So over to light burn a sheet of acrylic in the machine let make this design I got off Thingiverse https://www.thingiverse.com/thing:4201220. I have relayed it out slightly different as I want to fit on a sheet of 300×400. if someone wants it will share it.
as I want a good connection going to start with the 4 pins i have given up on the six-pin as NEMA wiring is too fragile.

Not everything you find on Thingiverse is right so had to modify the file slightly to get it to work but now a more compact jig. as the dfx is segmented and didn’t cut right in light burn fixed now and modified the base as was too big for smaller workspace ready to solder tonight. got 1 socket to solder

Nice and neet now for the heat bed connector need a new connection as the board is about 20cm further than it was originally also my bad soldering means it intermittently doesn’t work. so time for a fresh connector.
time to solder up a new heat bed connector with longer wires so I can wire direct to PSU and solid-state. out with my soldering iron I know the following
Pin 1 = Thermostat Positive if wired wrong alarm will sound on SKR board
Pin 2 = Thermostat Negative if wired wrong alarm will sound on SKR board.
Pin 3 = Heated Bed as 220vac voltage don’t matter which goes to witch
Pin 4 = Heated Bed as 220vac voltage don’t matter which goes to witch


have put continuity meter across the pin and end of the cable and they all check fine
now to wire it all up and we should be good to test.
all ready just need to shorten the neo pixel cable as made it way too long. going to use the bit I chopped the neo pixel wire I will use for the filament run-out sensor cable. Then it’s time to finesse the cable management.
The next issue the fan direction vent is hitting the y axis so going to make my own custom offering so going to find the footprint of 120mm fans going to make it easier to fit low profile fan shrowd. should have space as gone for 35mm high to 19mm high

So should have good clearance space. 6hr print will run tonight need to swap filament as running low on Neon orange.


The wiring list is getting shorter just time consuming getting there.

Time to link the raspberry pi to the relay using 5v ground and pins gpio pins 23 and 24.

Temperature sensor installs time so using 3.3v ground and Gpio pin 14 for the probe have added the Dupont connectors to go over the gpio pins going to have to do some changes via rasp-config to let the system know pin 14 is sensor pin. but will check if this is needed or not as it is an old guide I read. I will also need to add a plugin so it will display the internal temperature of the enclosure so I can monitor and adjust the fan speed accordingly.
going to have to change the sensor type as this type I have installed does not have a pull-up resistor on it so just ordered another type off eBay so will swap it out.


Finally, The wiring is now all complete just need to test everything works.

The camera light relay I have pre-made a cable from the 12v supply the positive will go to the power connector negative will go via the relay so I can switch camera lights on and off when a print starts and ends. have had a change in the design as I’m not using USB switch going to wire power connector to where the switch was going an install an A to A USB panel mount so I can connect the camera to pi externally power will be via the relay so I can turn halo on and off if required, should have parts Monday. as I wired the power socket tonight I had a thought about the USB connection wouldn’t work. back over to fusion 360

Designed the first version it’s printing now but it’s not going to work as needs relief for the screws so have remixed it further and come up with this going to print it so have both options but think this is the winner.

As you can see from original to remix v1 and final v2 these are the things you have to take into account when remixing a project.

In fact, I am going to redesign it again as the cable layout is different so back into fusion I go doing a scrapy print to see if it works but this should be the final design have made a few changes including screw head relife and it fits perfectly added to the remix pack

this project is pushing my design skill and I love it.

Time to fit it all into the machine.


Right, I am on the home straight I need to make some form of protection for the printer’s innards.
going to cut some black acrylic insert them in the middle of 2020 extrusion as dust covers.
so been thinking about how to do this without having to remove the front of the printer going to do some testing. I am going to cut some test bits 20 x 74 mm at a start to see if I can insert it then centre and add a fixing clip to hold it in place I will then make will also design a middle clip that can be removed to gain access. well,
that’s the idea, time to make some test bits. so over to light burn and as I have some offcut left from the jig build going to cut some strips to see what can be inserted,

So looking front on Left = 77 middle = 146 right = 75 now to make 2 x 200 long size X plates for each area will then 3D print the customizable design for centre plates then to design some clips that will be after I have the covers fitted.
I have decided to make it a 3d printable version obviously they will be subject to where your cross braces are. but you can customise them in the slicer. i am going to print my covers so they match the base as I could cheat but I want this to be a mostly printable design. also, put a clip together
the first plate is printing


Clip design I have put these in to hold the panels in 3 per panel so 24 in total. currently printing a sheet.

final plates are printing on the printers should have all the dust covers done tonight then I am ready to assemble the 2 parts have hit one minor snag as the end stop bar is skimming the middle plate need to take a few mm off it to get it to work right will think about how I do this might just be a shorter screw and a 10mm off the tube with a hacksaw. No, I own a 3d printer. so now printing a shorter 11mm x 20mm tube and have a shorter screw to fix the issue.
All fixed worked like a charm now does not rub on plates and makes contact with the endstop. all plates fitted made a cut out for dust cover so waring was more neat.

dust covers all fitted and wiring from neo pixel hidden also hidden the filament sensor wiring if there’s any interest will publish all the other bits I found on Thingiverse that used to help with the project.
Yay parts from china
Just as I was about to put a pin in this build and post the post I have now received parts from aliexpress so back on to some more upgrades. lol so this will be tomorrow as one PCB to fit and wire and one sensor to attach. and a Flexi plate to stick and fit.
So a new day has dawn going to try wrapping this up today bar printing or tuning.
UPS big tree tech
This should be easy to install one 3 pin plug to the mainboard from the ups and 12v supply just got to figure out where to place the board in the enclosure I think I am going to make some holes and add some standoffs as I did with the 2 channel relay. need to look into firmware changes for its use will cover this at the end of this post.
My fingers are crossed my calculation for the footprint of the board is correct and this just pops in with some m3 screws. Well, I’m too good fits perfectly just got to finish wiring it up.
Make sure that the + & – are wired correctly as will destroy the PCB if wrong they are labelled on the bottom of the PCB then links them to the power input on the mainboard like shown below.

then insert the 3 pin connector and connect to pwr-det on the mainboard and then back to ups PCB and it’s all installed hardware-wise.
Now for firmware changes
There are 2 files you will need to change first is in the feature folder look for powerloss.h

I have changed debut and saved each cmd this will save the last state on the printer if there is a loss of power now over to the Configuration_adv.h search for POWER_LOSS

then uncomment the above this is set up for my printer mainboard so pin number might need changing on your device. and purge and retract might need changing as well.
will compile this after making other changes for the filament runout sensor
Filament runout sensor big tree tech
As I waiting for this to arrive seller sending another one middle of February so instead of moping around the workshop getting ready for it all to arrive.
Ok have found a bracket on Thingiverse I am going to remix it so I can mount the bracket directly to my 2020 so will be adding 2 tabs in Fusion 360 so I make this a reality. first, I am going to import the mesh in and will draw two rectangles using the top face of the bracket I then extruded them by 4.40mm then made a centerline in a sketch and added matching holes time to print
Quick and dirty modification but will work.

Just waiting on the current print to finish should relay run the farm but need to get neon orange up and running it’s on my list of things to do. it’s a long list as always.

Printed ready to fit when I get the parts. just test fitted will just what I wanted.

As I now have the parts time to fit it all to the frame for real as the sensor has arrived.

Going to connect it to the mainboard E0-STOP port you will have to switch it on in the firmware pin 15 was already selected for filament runout.

Now you will need to turn it on in firmware so in configutation.h
find the following FILAMENT_RUNOUT_SENSOR and uncomment it like below.

Next, scroll down and uncomment the following FILAMENT_MOTION_SENSOR and FILAMENT_RUNOUT_DISTNCE_MM set it to 7

and with that just need to reflash with v5 of the mancave monster firmware on the mainboard and we should be good to go.
My Current Firmware CR-10 BTT E3 mini 2.0 with BTT UPS, BTT Filament runout sensor, BL touch and Neo Pixel 18 pixels installed compiled here if you want the vs code files ask and will happily link it for you.
all components are now installed going to join the 2 printer halves and running initial tests. fingers crossed before I permanently bolt them together. Wiring issue, not a big one negative on neo pixel is the wrong way around not a biggie just taken a photo of the pins.

remade the connection so let’s test it again. now seems to all be working.
Homes check bl touch works check hot end heats not working for heat bed erm ok not heating need to check the wiring.
Got a feeling negative is what I meant to pass through the SSR going to go back through my notes.
Was 2 issues had heat bed plugged into the extruder and hot end in the bed and the negative was positive no damage all fires up now and works
Just print the front left panel with a modified hole for screen cables. so going to leave that running overnight, just fitted and perfect so that’s finalised.
One thing i will need to revisit is the relay board but I think that will be done in the future as projects are already way overrun and used lots of PETG I really need to invest in centre callipers they are uber expensive one day shall order some.
Time to modifiy my racking
The next job is lowering the racking so I can fit the new printer on the shelf need to move the spool holders down and then drop the shelf level down by 15 cm approx.
cleared the shelf and now to focus on removing shelf and old wiring as will rehouse the wall-mounted pi down also binning cheep fans as they temperature should never get that great and the nose one of them I producing is bad.


Have managed to drop shelf approx 120 mm have refitted shelf and refitted Prusa’s have moved my pi off the wall and disconnected fan. I shall monitor CPU temp via the plugin.

Now to place the printer in its place well nearly first flash the firmware and cave monster ready for action well nearly as I want to finish off the mods before I set it in place.
TFT Screen firmware configuration
One final tweak I wanna look at is the firmware for the screen as want to disable a few features and rename some descriptions if I can not sure it’s possible. but by the power of google.
first up looking at the config.ini
In order for the TFT, firmware is able to provide all of its functionalities/features, ensure that the following options are enabled in Marlin firmware.
General options:
- EEPROM_SETTINGS (in Configuration.h)
- BABYSTEPPING (in Configuration_adv.h)
- AUTO_REPORT_TEMPERATURES (in Configuration_adv.h)
- AUTO_REPORT_POSITION (in Configuration_adv.h)
- M115_GEOMETRY_REPORT (in Configuration_adv.h)
- M114_DETAIL (in Configuration_adv.h)
- REPORT_FAN_CHANGE (in Configuration_adv.h)
Options to support printing from onboard SD:
- SDSUPPORT (in Configuration.h)
- LONG_FILENAME_HOST_SUPPORT (in Configuration_adv.h)
- AUTO_REPORT_SD_STATUS (in Configuration_adv.h)
- SDCARD_CONNECTION ONBOARD (in Configuration_adv.h)
Options to support dialogue with host:
- EMERGENCY_PARSER (in Configuration_adv.h)
- SERIAL_FLOAT_PRECISION 4 (in Configuration_adv.h)
- HOST_ACTION_COMMANDS (in Configuration_adv.h)
- HOST_PROMPT_SUPPORT (in Configuration_adv.h)
Options to support M600 with host & (Un)Load menu:
Options to support dialogue with the host (as a prerequisite)
- NOZZLE_PARK_FEATURE (in Configuration.h)
- ADVANCED_PAUSE_FEATURE (in Configuration_adv.h)
- PARK_HEAD_ON_PAUSE (in Configuration_adv.h)
- FILAMENT_LOAD_UNLOAD_GCODES (in Configuration_adv.h)
Options to fully support the Bed Leveling menu:
- Z_MIN_PROBE_REPEATABILITY_TEST (in Configuration.h)
- G26_MESH_VALIDATION (in Configuration.h)
I didn’t use this as couldn’t get to compile I will revisit this
- Z_STEPPER_AUTO_ALIGN (in Configuration_adv.h)
so that’s the merlin firmware now done not to look at the config.ini.
custom logo

so lots of settings and functions here have changed a handful of colours and the way it talks to octoprint.
next up going to look at the actual firmware pre-compiled so I can see what changes can be made. that will be a separate blog post I have added a new icon set and flashed the screen with new firmware to see if it helps.
Dragon Hotend and issue correction
K decided I would go the full whole hog and upgrade the hot end as well. as I wanna look at the movement in the x carriage on the extruder bracket. I also why it is quite tight on the belt.
Issue 1
I fixed it was the hole the direct-drive bracket is bigger than the m5 to linear rail bolt hole so have used 2 countersunk screws to centre the bracket. works well,


Fitted the dragon
I have removed the old OEM hot end. 2 screws and that’s gone now to fit the dragon hot end using Capricorn petg tube between it and the direct drive all fitted now to put the hot end back together upgrade is done. but not quite right cannot get filament into hot end tubes not quite long enough so time to order a length of it so I can get this right.
Issue 2
I noticed there is a lot of friction on the belt so I am going to swap the pully end around as I want this to be smooth and can align the pully across the beam. 4 front screws removed. pully off and rotated now to put the machine back together much smoother think I have fixed it might need a slight tweak but let home the machine and see what happens.
just going to make a benchy test. before I fit the new flexplate.
running into issues with filament sensor the hot end now clogged got a feeling the Capricorn tubes melted so I am going to strip down the hot end tonight and have a look and see if it’s down to that as removed nozzle and still cannot get the filament to come through. have ordered a back up hot end the big tree tech v6 hot end and a fixing bracket as a backup as got a feeling this isn’t right.
will disable the runout sensor for the calibration as I have a feeling it’s thinking it’s a clog on the hot end even though there is now a clog.
removed hot and cleaned and the issue blockage in the tube put it back together loaded it ran 20mm through it and bam blocked again so might be my filaments shit or the tolerances of the tube is too tight might try a different batch and see if I get any joy other wire going to revert back to my back up but that’s going to delay first print. by 3 weeks but going to launch this part of the build and then come back when it’s all printing right. at least makes me know that the runout sensor working. so will re-enable it after I have a calibrated machine.
going to first install the flex plate whilst i figure this out.
BISQU Flexplate
This is something I love on my Prusa printers will hopefully be the same experience. so to install going to need to stick the magnetic sticker to the glass bed.
so have turned over the glass sheet and cleaned it using isopropyl now to apply the sticker sheet went down will not be 100% straight but no one will notice.


before I test the plate on top. going start by resetting the EEPROM and then going through calibration again as don’t want to mess the sheet up. but that will be in part 7
all fitted now a waiting game for the new hot end so will leave this here final part will be testing it all out.
