Finally after 4 weeks of waiting my upgrade is here..
So whats in the box?
So after an hour of taking your old machine a part you will get to section 15. So all i need all the stepper motors 2 pulleys the led screen cables and cover if your sticking with the colours and that it. Everything else is new. Oh, and threaded rod lifters missed that.
Next up the printing now if i did not have PETG in my collection I would be doing a 36hr print using the 2 rolls of pet supplied with the update kit. But as i have been prepared for a while i did this in Ultraviolet PETG and Black PETG. parts already printed.
Now to let the fun begin. armed with my own Allan keys and magnetic dish and the free Haribo Goldenbears. That will keep me going time to build my self an Mk3s. this will be over several nights as like taking my time it can be done Quicker but I am no pro.
Y-axis and frame are done
so is x managed to crack a part so going to reprint idler side of the X-axis whilst i have put violate back in my Prusa Mk3s .
I saw when building Y-axis that Prusa has updated belt tensioner. so that’s going to be done overnight as well.
10% in then i can get x finished.
also couldn’t go any further i missed 2 bits off the list of parts and thankfully there in storage so i will need to swing by and grab them tomorrow after stock check at office and meeting new tenants.
so will resume tomorrow loving the colour.
been a stop start as over night parts fitted but then noticed motor end was cracked so reprinted it. 4 hours.
I then realised updated parts need different motor mount as they won’t fit if not. so back to old-style as could not bare another 4hrs print. and wanted to get it built. added the missing trapezoid nuts that i retrieved from the storage unit.
so finally fitted Z motors and rods added X axis to Z axis. and screwed it all done.
Went to start the extruder and soon realised the link i had been given was mk3 not a mk3s so i am now printing over night the upgraded bits.
So that as far as i can go today.
back on the shelf till tomorrow.
parts off the printer and off we exstruder motor monunt fitted hotend installed and magnets for filament sensor all installed. righ now to install the x carrage. oh its diffrent looks like another 4hr print. missing 2 bits as the x carage has 2 parts hoping this i my last delay in the build.
all done hoping last delay
think i might run thought the rest of the instructions and make sure they haven’t updated anything else. pretty sure it was just the extruder they did upgrades on but going to have a quick look.
exstruder all done. time to fit to the frame.
Was a late one last night managed to build and install the extruder fit the PSU and LCD oh and heatbed.
Now on the home straight wire management and controller board and we are done on the build hoping to do that at boys nap time then just pre flight checks and we are good to calibrate.
Wiring and cable management time..
all wired preflight checks done time to calibrate my machint.
All done and z height calibrated now to home ultraviolet the cave make sure webcam is in the right location and we are good to go. the mark not the screen is as its off old machines managed to damage a while ago but works fine so not going to change it.
Z cablibrated moved in to its home
needs some web camera adjustments do them later.
will do some calibration testing later now to print the spooler in orange and new control knob for neon orange. will update more later. give my summery of the upgrade kit and build.
This is a daily blog that i will be doing during the lockdown as i want to keep a record and show day to day operation in this strange time. as try to keep my mind off the virus.
Printing lots of PPE and cutting screens for PPE along with making buttons to give away to people rasing money for the NHS our life and blood in the UK. during this strange times.
500 screens cut
Screen Cutting Jig
Dispatched 100 face masks mine and Nik and Caleb efforts
Octohub running telling me things are done
255 thank you NHS buttons to be given away to support people raising money for NHS
2nd cut and engrave of the day
fun 40 mins work.
Then today i finally got around to looking at my Prusa i3 Mk2s MMU yes i know i have promised for months i was going to do it. been sitting in the house for 2 night keep putting it off. to day i decided to take a look so took off the mixer and noticed that the Square nut that the mixer head goes in to was not aligned in the hole so i out it were it should be and thought wouldn’t be that easy well it was managed to print a calibration cube dialed in the first layer just printing some wall brackets as i am going to be running filament from above.
So now have 2 working prusa’s do i look at the CR-10 tomorrow and got for the hat trick.
working at last
one little nut stopped this from working argh
now i can print the rainbow
Have also made moved my resin printer out the way so i can have both printers next to each other. just printing brackets so i can mount my spools of filament above the printer. will check out the MMU at a later date as PPE is what i am running.
just printing bracket for MMU before install the second printer. will update the post when done.
lets see how this works just installed this bracket from thingivers can download it here will need some ptfe tube to get the bracket working.
installed ready to print
brackets installed
Away we go
Next up will be moving my heat press’s out of my workshop and install my cr-10 back into the man cave to get a 3rd machine running. Well hopefully as i am on a roll of fixing and braking stuff mmu went down again last night my fault but back in the game again now adjusted idlers wrongly. now ready to print again.
So once i have had a postman come should have more filament till then i will use up my old supplies. No filament found some Neon Pink in my store so some colourful prints coming up.
going to start date and time stamping live blog as i do more work on my machines.
17/04/2020 23:05
bah mmu down again got one more thing to try if not i will go back to the drawing board. or bite the bullet and get the upgrade to mk3s full kit. did not even manage a full print.
also dident get a chance to do cr-10 last night as put the boy to sleep and felt knackered.
18/04/2020 10:30am
any how enough excuses back on with trying to get the mmu and cr-10 going.
18/04/2020 14:30pm
CR-10 is shorting issue as plugs come lose looking for a pin out diagram.
18/04/2020 20:05pm
Found it on my one of my prior posts Doh. i have just pulled my gas soldering iron out and re solderer properly. Just got to put the boy to sleep and we are good to flash the freshly compiled firmware then will build a raspberry pi for it and add it to the network.
18/04/2020 21:08
Flashed sd card with fresh copy of octoprint now to get to on the house wifi before then have to change it for the mancave wifi later but for configuration house it. just going to dig out a USB cable bring the printer back in and then the fun can begin.
Going to flash the firmware with latest version of TH3D firmware.
18/04/2020 22:28
Right its not going to happen tonight i have a thermistor showing an ambient temperature of 730c its a silicon heat bed so not sure i just change it going to do some reading and call it a night will resume in the morning.
Happy modding printing creating and enjoy these strange times.
19/04/2020 11:49
Morning all back on the case had some thoughts about some further testing on the cr-10 as it might be a motherboard issue so going to get my multimeter out and probe the thermistor with my trusty multimeter to see what readings i get as when recompiled the firmware last night to not have the silicon bed it dropped to 499c so wondering if its an issue with compensation with software. so will take some readings should see 100.00 ohms ish for room temp are right or wrong. if right will approach the TH3D and ask some more questions. i have also been donated a motherboard from the 3dprinting kid so might do a complete board swap out. see if that fixes the issue.
Have a user of the Prusa owners group come back with some suggestions so might give that a go as well see if we can get the MK2s mmu stable as have all the parts. first some family time. as i have set first print of the day going. more mask frames. got to cut some buttons.
19/04/2020 18:05
Been struggling to do much today but have taken a reading on my CR-10 figured out it 100k thermistor found this chart as is am seeing around the 144.9 figure. so around 17c will take a measurement later as its on one of our storage sheds and the tumble dryer is running to make sure this is changing temp correctly. I have put a thermometer in the room to give an estimate of temp as the bed should be colder.
he chart below is just to help others
So tonight will swap over the control board with the one i have been given and then see if we can get this all working before i turn my attention to the Prusa tomorrow,
got 200 screens to cut tonight once my boys in bed and going to do some more buttons have cleaned and made ready 225 night before last ready to ship out.
Cleaning up and removing finishing tape
Ready for shipping.
see how time goes as got to some filming for my business as putting together some how-to videos for products.
Will update later after eaten and little one has gone to bed.
19/04/2020 21:11
Time to take a CR-10 to bits one more time hopefully for the last time of the week. wish me luck.
19/04/2020 23:30
swapped over the motherboard reflashed the new board and still, no joy time to ask for help have emailed TH3D as they are the supplier of my levelling probe and ezout sensors.
2 hrs of my life i wont get back lol.
going to call it a night.
22/04/2020 17:50
Sorry for lack of updates busy 2 days cutting printing and trying to fix printers.
have been looking over marlin config files have found a line of code that i am going to try \\ and see if that solves high temp ambient heat.
bitten the bullet on my prusa mk2s mmu going to upgrade to mk3s as then will have 2 reliable printers. 2 to 3 weeks wait but will double my output.
been playing cutting speeds as 1hr 30 mins to cut a sheet of buttons is too long going to cut faster with more power and have changed power and speed on engraving so should be 37 mins per sheet. will test later as want to get the buttons out.
Some images of last night.
Ready to ship.
Labour of love .
More buttons being cut.
more coming later.
As i have ordered the upgrade kit i will need to do some prep before the gets here in 2 to 3 weeks so i am going 1 disassemble the mks2s mmu and salvage 5 motors and 2 pulleys with bearings the lcd screen and surround. i also have a 19hr and 15hr pteg print for parts needed will cover this soon.
23/04/2020 00:38
Have printed 14 frames today and cut 140 screens jigs starting to fail going to make new version as hav had some ideas. Also cut another 100 buttons.
Calling a night here.
Going to attempt one more thing on the cr-10 before giving up for now might strip down the prusa tommorow and will start on parts for the upgrade on week end as want all in place by the time it gets here. So will just be a build. Might stream the build if all goes well.
24/04/2020 17:00
Right it the end of the road for the CR-10 for the time being as i cannot find an answer so into the attic it goes. got 4 sheets of buttons to run tonight and as that is going on will strip down the Prusa mk2s mmu and take the 8 bits that are needed to keep. rest will go into bag of bits as spares.
still printing ppe in the background though i will need to do a 19hr and 15hr print to get the bits for the upgrade i am in 2 to 3 week Que on Prusa website but like to be prepared for the arrival and have everything in place. more later.
24/04/2020 23:20
been bust have stripped most of the bits from the Prusa mk2s that i need. till got to get 2 bearings and 3 motors but won’t take long to have all the bits i need for the upgrade. already studied the manual back to front.
And so it begins.
time for some de wiring.
all extruder motors free.
now to remove all wring.
all removed.
bye bye heat bed.
next up the z-axis.
Bye Bye old friend
Still to strip.
Bits to strip down.
I have decided to do first long print with PETG i am scared as never used it, I have heard mixed things about it. So have loaded some Prusa PETG it into the machine and embarked on the black bits for the mk3s upgrade and so far so good.
away we go First PETG print time to brave it.
monitoring it remotely from my lounge as finishing off 77 more buttons.
feeling happy its seems to be holding to the bed will be keeping a eye on go back later and take a picture later
Will go check with it later on before i go to bed on quality so far so good.
6% done holding to the bed fingers crossed.
right time to sleep. blog tommorow
25/04/2020 12:19
Afternoon all just a quick update printing going well 14hrs in to 19hr print.
Next up the Orange or in my case translucent red for the orange parts and new then new knob and LCD screen surround. that i have just sliced ready for print. all sliced for a 4hr print so around 40hrs of printing for all the parts needed to make Prusa printed parts for upgrade.
Back on to button cutting later 3 more sheets of 77 buttons to complete and i am up to date.
24/04/2020 23:01
Right done 2 sheets of buttons done just need cleaning. The black PETG parts all done not sure i have to redo the wire support part got to load the stl up and have a look. then took my red which is violet translucent wow.
love it wow going to be a fun upgrade.
Had to be done so halfway through a 15hr print then final 4 hours of new LCD screen housing. Right I am done for today.
I have been busy cutting material patterns for my wife side project.
fun with the co2 laser.
Made some more studio lighting for overhead filming using led tape and dimmer switch.
led light bar and camera bar. for over head camera
linking the lights together.
Getting the old printer ready been a fun little side project still cannot believe what is going on in the world today.
all that is needed for the upgrade from old printer.
Hopefully Joseph Prusa will pull it out of the bag nice and quick. 2-3 weeks hoping for more like 2.
will be back on PPE tomorrow happy that i seem to over come my fear of PETG.
going to try having a early night.
26/04/2020 8:45
Morning all well 2 hrs till the next plate of parts are done. then just the lcd display surrond and controls knob so in around 6 hours should be all done.
2hrs to go 15hr print.
The last sheet of buttons todo today then going to cut some more material for the wife as she is making rainbows for NHS back later.
26/04/2020 10:35
Well another full sheet of parts for the incoming Prusa upgrade kit. one more 4hr 19min print and i am done till kit arrives right time to clear the bed. make some breakfast.
All done next up screen cover.
19 seconds time laps of a 15hr print for your entertainment.
26/04/2020 10:43
Morning all another day finally got all parts printed for Prusa upgrade just printing a wall-mounted spool holder as my broom handle isn’t working as well as i would like it, so as i am on a roll with PETG i thought why not do a wall mount spool holder for the smaller spool hole so now 3 hrs into 7 hr print. button production is all done just need to go to the post office and post them. if rain passes will go for a family walk.
27/04/2020 17:20
Nearly done at 90% then to mount it to the wall and print more masks. been looking at the nyloc mod going to do some more research on it but might be a good one to do.
have also figured out my camera mount is not good for tall items see image below.
28/04/2020 20:22
More upgrades going on if they all work then repeat for my ultraviolet Prusa Edition going to do the nyloc mod as looks like will help make on making the bed flat. Done using a plugin and manual adjustments looks good. I have ordered bits so i can do it. have also ordered some bits
so what mods am i printing well i have had to print a new guide for the filament as been warn away with my makeshift broom handle spooler. I printed a new one yesterday and forgot to post pictures must be losing it. Well, I installed it and has some issues with it so adding some wall management and pulleys to aid filament supply to the printer.
28/04/2020 23:44
New camera mount came out great. waiting on magnets 6mm x 2mm should have them tomorrow as then won’t suffer from bumping camera and have a fixed rail so can move up and down.
New filament guide in PETG came out great as well so now have smooth feed.
Filament management is currently on the printer should finish at 1am so wont be waiting up on that one as going to bed soon.
parts are on there way for this so tomorrow will be a day of pictures have managed to produce 6 frames today but had 2 failures down to filament snag so stopped to get this working.
Right early night for me i hope. seems to be 2 am every morning. will post images tomorrow. once i have had 5 mins to edit them.
29/04/2020 18:39
Been another busy day doing day job got parts in will assemble them later and post more images and information later. just got to strip down my racking of heat press as not doing any sublimation work in this climate so will put it in the attic till I’m back doing sublimation work.
going to so some spring cleaning tonight as i want to get my cnc machine working. over this lock down period so going to go through my draws and clear out part i m not going to need a box them up to come back to later. clearing up space so i can get on with fun stuff to entertain you all and learn stuff in the process. I have been prommising my 2 1/2 year old a door sign so will star with configuring the cnc milling machine and see how i get on. seen some nice printed projects for bit for it that i am going to make. will also be printing a dust cyclone.
Go back to printing ppe masks tonight if my modified spooling system works.
30/04/2020 10:20
Was a non-eventful night as having had some issues with z height was late so-called it night not sure whats the issue is might be as moved printer going to have a play this afternoon after work as need my full attention.
30/04/2020 15:15
Back printing was too much tension on my spool idea so have done something that will work for now will do some changes over the next few weeks gives me 2 materials per printer. will show images of half the system in place later new camera mount works very well going to install a dimmer switch to take off the glare fromled light on the print bed.
back printing fist standard speed run before i put the printer back up to high speeds.
I am going to be setting up separate lighting and PSU power on for each machine so i can turn lights on and off independently on each printer. the will both have Logitec C270 cameras monitoring them. with octohub reporting on progress.
need to take current relay module and put in a different housing as its all open putting my HSE hat on don’t like unsafe stuff.
think i spoke to soon as print failed argh going to do some more testing. have lowered the z height .05 let see if that fixes it. gone again going to do some more testing as thinking there something going on somewhere. will investigate later
01/05/2020 00:09
going to perform the nyloc mod tommorow
I do not know what’s going on but will be doing the nyloc mod tomorrow as need my printer back. going to lock up and bed methinks.
02/05/2020 18:00
24hrs later and my machine seems to behaving so having a stay of execution with the nyloc mod.
working at 200% speed.
as its been 2 weeks since i orderd the up grade kit i am starting to think ahead of what will be needed to be done so. i will be printing ppe during the day and doing mods for set up over night.
So first up is the lighting of each printer. so each machine will have separate led lights going with dimmer led tape as easy and cheap. have a shelf width 600 x 900 there’s a bar in the middle of the shelf so have two rectangles of 450 x 600 each will have 4 strips. i think i will inlay the light by 65mm all around the rectangle so tonight’s operation will be to take the shelf off and raise it by one link so i can fit the spooler under the shelf then my 3d vacuum sublimation oven can go back above it.
So have sketched my idea out in fusion 360 i will then tape the 4 strips to the under side of the shelf i will link them with wire final connection will go thought the shelf so i can attach to psu and relay.
when next print finishes i will do the fist part of this by setting up the strips and soldering them. once this has been done i will start on making custom pcb to make the circits for the 2 lights there will be a dimmer controlling both sets before relay controls them independently.
so the set up will have a raspberry pi 3 on each machine controlling power and lamp each set up will have a web camera. and a bar to control the height of the webcam. this will allow me to do awesome time laps using octolaps.
as its hard to visualize will show some images later..
03/05/2020 00:16
Right my light rings are done and old spooler put back and new pulley system for guest filament. i have also done the other side of the shelf ready for the incoming mk3s kit.
I decided to go 80mm instead of 65mm from the edge and drilled centres out for pully both machines. As both machines will have a guest filament input this if for the odd shape spools i get from time to time, in this case, it the BQ filament that i am running PPE on.
I started off by getting my shelf off racking and marking it out before cutting the led tape to size and sticking it down. i then tinned all the pads on it and started to solder link connections.
Half stuck down
All stuck down time to drill center out of each box.
Soldered link connections in
All done time to test
Both sides work time to reinstall the shelf
Spool is up high as going to re install other equipment.
All loaded ready to print some more PPE more to do tommow.
All done back on with PPE production for the night testing how the new spooling system goes
I then added a second bar for the camera mount as i had raise the shelf by one so i could put everything closer to the printer.
better being closer to the bed.
Lower angle makes for clearer picture for remote monitoring and octolaps.
Right time to get some sleep night all.
03/05/2020 8:55
Morning all going to be another day of printing PPE with a mix of wiring and printing.
so my jobs list for the day making 2 custom raspberry pi wiring looms and then 3d print 2 relay enclosures. I will then will move my raspberry so everything is mounted on the shelf easy to perform maintenance. I will also be doing some better cable management. so by the end of the day, everything should be in place for my 3d printers rack. Apart from the second spool holder, That i need to print and the second printer which i am hoping will be with me this week or next.
here is a system layout of my octopi setup. that i have put together.
layout of system.
First, up will be crimping some wires so will be making a link to relay module power connection to the enclosure. going to need 4 wires for the link to module going to use red and black for power. yellow and green for relay activators yellow for PSU and green for led lights.
03/05/2020 22:31
Right Relay housing is printing in PETG looking lovely it should be done in a hour have started to plan the wiring loom but still just need to pen to paper before getting crimping tools, wire cutters and possibly soldering iron. will make 2 the same as then every thing will be ready just to plug in the printer and go.
New camera angle
then got an 8 Hr print this is the first parts for the new printer’s spool holder will print the base tomorrow and the rollers as well if time permits.I have built my new camera mount for the machine yet to do an Octolaps print might do that tonight to capture the base of the spooler being printed. Great design as held in place with magnets works well with my racking.
PETG with 4 2 x 6 magnets i fitted and glued nice and compact pockets for magnets
Just finished mask number 32 for the last week. have got 3 bags of masks of Nik and Celab to sort and box up ready to ship.
Going to wait for the current print to finish and i will start the next one going and then going to try getting an early one as every time i sign off end up being up to 2 am. eek, too fast layer sift start again.
04/05/2020 11:01
Morning all was another 2 am as had a layer shift as forgot to slow the print down as PETG and not PPE so had to start over round 23:30 as i was about to go sleep noticed it had finished printing so jumped out of bed and cleared off print and started 7-hour print. finished this morning. so was able to start back on PPE run first thing this morning so will be running them till around 8 before i change back to PETG and do rest of part for spooler as the current one is white might reprint that as well so they match the machines so violet and black for new machine and orange and black for the existing machine.
over night parts came out great
perfect over night printing.
Going to test out the new relay housing and remove old one off the wall transfer all the wiring over going to also move the raspberry pi and do first of the 2 looms tonight figured out the circuit.
Well that was my evening plans cut short as the relay enclosure dont fit the relay. not to worry I have some relays turning up mid week. So will see if they fit other wise will have to make me fit. so just printing base plate of the spool to fill time tonight i moved the camera so time laps is going to be not good. might go move it
Looks like the i knocked the camera.
05/05/2020 17:00
Been out at the office today so left a big print on the printer to keep it busy going to bug Prusa tomorrow as will have been 2 weeks already since i have ordered my printer.
Will post a timelapse later. Still waiting on parts to arrive should have relays today at some point so will get on with wiring later IF they show up. let down by amazon so will be a night off tonight.
well you know me just doing some prototypes for our daily crafting project and printing solder fingers makes joining wires a lot easier.
Just pressed fitted bearings into new spooler got to gut 180 mm of 8 mm threaded rod and put it all together. really need to buy a vice.
06/05/2020 9:18
Well ordered a vice will go pick it up today from screw fix click and collect so i can finish off the spooler, and mount it on the wall.
some images from last night as dident get around to it last night.
all bits ready to assemble
new soldering tool
should make life easier
Press fitted bearings
both sides done.
magnets glued in second camera mount,
06/05/2020 23:40
well, new relays fit with some trimming down of enclosure got my vice cut the bar and assembled new spooler for the second printer. and started second octopi build.
all ready to build
All built ready for the wall.
the second pi build heat syncs. in
all bolted down ready fro custom wiring.
Think first sign of madness is setting in as named my printers and even created custom logos for them. so now features in my stream.
08/05/2020 1;41 am
One day will go to bed early, been busy making looms done both sets of raspberry pi GPIOs looms to 2 channel relays. will post some images tomorrow will write updated GPIOS as went with 12 pin connector makes for a more compact loom. Right time to sleep. tomorrow I will do lighting relay loom and prep second kettle leads to go through the relay to control on/off power to the printer.
08/05/2020 9am
the joys of a 2-year-old am up and first print of the day is on as promised here are images from last nights wiring will do a full schematic shortly. as I need to write it all down. oh and test it all before i publish it.
next up is the relay power side this will control printer PSU and LED lights. Word of warning you are playing with 240 volts don’t do this unless you know what you’re doing. #
going to start off with the led wiring going to need to put the live throught the relay so nc and com. so first off goint to wire up 2 jst connectors from the shelf down to printer shelf.
so out with my new tool i printed solder fingers so time to solder the wires and heat shrink. them. now i have extended the wiring i will join the negative wires into the 2.1 x 5.5 power connector on the positive side i will run 2 wires 1 to each relay com connection then 1 wire back from nc connection on each relay this will connect to the positive connection of the led lights. this will be wired into relay 1 of the 2
Right to get this to work will need to install the enclosure plug-in in octoprint and configure a light on gpio pin 12 this will allow you to set it so the when you start a print the lights will power on and then wen the print completes i will turn the light off. will add images later. once i have done it.
Power side i have taken an old kettle lead i have stripped the isolation off 4 approx cm of the wiring an cut the live. wire i then strip both sides and add a pin connector crimp so will make a nice connection in the relay. the 2 live wires are then put in pins com and NC on relay 1.
On the octoprint setup install psu plug-in and configure pin 11 to trigger power on and off again this can be set to turn off the printer after a print completes.
I will cover this process in-depth later on once done with wiring done. wont go over building octoprint set up as have done this on prior posts.
08/05/2020 23:26
Right wiring done tested had a issue that turned out to be a blown fuse so will put the relay wiring back together and do cable management tomorrow back to printing one more set of frames. at least I know it works,
so what you going to need to do this.
12 pin dupont connectors
4 pin dupont connectors
10 female dupont connectors crimps
Crimping tool
Wire cutters
heat shrink
soldering iron
octoprint set up
raspberry pi 3 onwards.
Optional
pin crimps
pin crimp tool.
I am not going to talk about how to set up octopie as if you search here you will find a guide on that. this is to presume you have octoprint installed and up to date.
you are going to need to install the following plug-ins
PSU Control
Enclosure plugin
this is the only part of the gpio we are interested in.
the connector i am wiring up is using an extra 5v+ Ground for the cooling fan so that’s optional. just google PI 3 GPIO and you will figure out where to plug in the connector below. white squares are unused pins.
12 pin dupont connection
to match gpio pins above white squares not used.
pin 2 = Relay Vcc +5v
pin 4 = Fan + 5v
pin 6 = Fan – Ground
pin 9 = Relay Ground
pin 11 = GPIO pin 11 PSU on/off trigger
pin 12 = GPIO pin 12 Lights on/off trigger
4 pin dupont connector
match colours wiring
pin 1 VCC Red wire
pin 2 GPIO Lights Trigger Green Wire
pin 3 GPIO PSU Trigger Yellow Wire
pin 4 Ground Black wire
connect to duel relay board match vcc and ground. on the relay 4 pin connector
relay 1 is PSU power so will need to split the positive connection to the live feed obviously do this when unplugged from mains voltage.
Insert one end of the split wiring into com connector and the other into NC (Normally Closed) and screw tight.
Now for relay 2, this is where it gets a little hard to explain but i will try my best i have a screw terminal 2.1 x 5.5 power connector female have joined te 2 negatives from both sets of lights to negative connection. the live side has 2 wires joined together one for each set of lights each wire goes to each sets com connection then the NC side has the positive wire from the led lights so each relay has its equivalent.
right to make my ramblings more legible have done this wiring diagram.
hopefully this will make more sense.
all wired up. now to configure the software side.
fist up click on psu controll in configuration set the settings as set below.
copy this to get it to work
no scroll down. To power offer, i have mine set up for longer at the moment as keep going in and out to take prints off the bed. but if not usually set the power-off time for 30 mins.
set idle time out for 30.
going to look in to sensing as GPIO pin options as might make things easier as when it turns off using commands usb port times out so will see what happens if i use gpio method over comes that.
Next up go to enclosure plugin
set output type to regular IO
label in my case is lights.
id number 12
I am going to investigate other features in the future. As print start to turn on the lights and 30 mins after the print ends will turn off lights. in theory. will try that out tomorrow.
system should be working now. will add more as i do it.
09/05/2020 11:17
Going to be a busy day, will continue guide above first print of the day is on the printer when that is done should be son’s nap time so will do some cable management going to move printer out. then run all the cables stick the relay housing down and screw the pi enclosure to the wall. i will then refit the printer and continue printing and repeat for the other printer space so when it’s here can build install and print.
00/06/2020 22:38
Was mother in laws birthday to day so time has been limited to running frames will do the install tomorrow instead. have been updating the guide above will finish the software side tonight.
Right guide done as far as i am i have done it. will do cable management and get everything neatly installed and then can continue with a clean up of the workshop as want to get my CNC machine running before this lockdown ends as i have some jobs i wan to get done. tonight i am going to call it and have an early one.
10/05/2020 10:50
Morning all wiring tiding day once little one goes to bed.
10/05/2020 15:23
Managed to wire and tidy up t printer. however, it keeps on popping fuses think i might try 13amp fuse. as all wired correctly but here is some images for your enjoyment.
Wiring all stapled and cabled tide
Pi all wired up and wiring tided up
I have wired the lights and mounted the pi to the wall just need to add the webcam and the USB cable network cable and make the mains cable up.
right have bypassed the relay till i swap fuses.
but back to frames as the need to get some shipped out tomorrow as starting to fill up my workshop. also need to finish filming some shorts for my day job. so need to get worktop clear of bits that i have taken off the shelf and move my vacuum press back into the workshop. will do more tonight.
11/05/2020 16:12
I Have been out doing day job stuff printing frames in the background. I am just about to speak with Prusa to find out when i will get the second printer. Tonight i will clone octoprint to the second pi and install USB cable and camera. will also install second power cable and test it all then that rack is done. Ready for the printer.
I will be shipping off some on my sublimation printing stuff off to storage to give me a little more space as we don’t need them for the time being. took some airsoft bits.
I am going to bag up all my guns as don’t think will be playing for a while.then can put water pump bucket out freeing up shelf space as really want to get CNC machine working. did have some thoughts at the failure of my previous attempt. So hoping by Friday to be all set up ready for some fun projects i want to do.
12/05/2020 00:06
Prusa bad news got a further 3 week i will need to wait for the new printer oh well everything is ready for it to arrive. just need to up t it all together. just cloned my PI sd card now writing it to a new sd card for another setup. will then change the theme to violet. going to change the titles to there names. NEON ORANGE and ULTRAVIOLET think I’m going crazy in the lockdown.
more spring cleaning and frames tomorrow and a trip to the office. more videoing for day job. After wife’s birthday is over on Wednesday will start playing with cnc machine.
night all.
12/05/2020 19:00
Not a lot was done today clone sd made just need to install it in the pi and power everything on but that will be later on this week then just need one more trip to storage to put some more stuff over there i will then be able to get the CNC machine up and running hopefully.
As i don’t like having equipment i cannot use taking up space and this is a very expensive paperweight.
13/05/2020 9:54
Another day in lockdown but it is my wife’s birthday so will busy today first set of frames are being printing.
13/05/2020 14:30
As i was clearing a print off the bed have put second relay together and stuck it down. and stapled gun the mains wiring down just got to run USB and camera wires and power up to the pi then will boot it up and configure all ready for the printer when ever it comes waiting on 2 pulleys as well then this little fun project is done will copy guide to its own post shortly.
currently playing will it or won’t it print on the filament left on the spool getting around 89 frames to a spool i think. so just waiting on my phone to let me know when the print is at 50% to do next check as the Prusa don’t like it when the filament gets to the end tends to do a jam in heat brake. so just monitoring remotely.
13/05/2020 23:15
Right calling it a night last prints on of the night. didn’t finish wiring up but tomorrow is another day. in the world of lockdown wife loved my crafting project added lighting to a vintage stage door sign. love led tape my soldering iron and
14/05/2020 14:14
printing printing and filming for my other business. tonight i will be fixing a lamp might document that for fun. anyhow back to filming more updates later on finishing wiring up stand 2 for printer.
15/05/2020 00:47
right was filming till about 2 hrs ago just been editing for my business will get more done on the blog tomorrow as just got to do some place holders and film rest of filming scheduled.
But then will get on with fun stuff over the week end. CNC machine is my goal.
15/05/2020 12:10
afternoon all HAPPY FRIDAY. have been busy with work this morning just had to pause my mask production for 5hrs as printing an endoscope stand to aid with close up filming of products. got to love petg such a nice material to print don’t know once i have run my PLA down might just print with it from now on.
stand all sliced up and away we gonow to printing will come back in 5 hrs
Nice new camera holder works well will be great for close up shots. see below. some m3 screws and nylock nuts holding it together great design can be found here. i have made some mods as its not meant for my smaller endoscope but some tape it works well.
one camera mount done and assembled.
Bad news the UK government has changed ruling on PPE so looks like down tools for the moment will keep you posted.
16/05/2020
As PPE production is on hiatus i am going to start with my CNC machine this evening. going to start basic and make a square and a circle basic but need to get my head around it once i have cracked that i will try more complex stuff.
So first up i need to clear my floor space and remove all airsoft bit bits as i don’t think with COVID-19 i will be playing anytime soon so going to bag them up and put in my top shed to take to the storage unit tomorrow.
I will then clear CNC machine enclosure as been using as a dumping ground need to go through it and see what’s in there.
Once i have cleared that going to move wiring and vacuum around and control box for CNC machine as this will allow for 2 more storage boxes for materials.
tools down issues with my laser think its a limit switch.
17/05/2020
Morning all well today i will be investigating my laser as need to get back up and running have ordered a new switch should be with me by Monday but here for your entertainment is a 19hr lightsaber timelaps.
18/05/2020 AM
Morning all got last last night so did not get a chance to update my post. lasers back up and working was a lost connection on the stepper motor driver.
Will be moving things around today. and finish off wiring loom for home and limit switches for the CNC as i want a working CNC machine. decided to print another lightsaber with removable core but it failed so going to reprint that today. anyhow back today job. more later.
18/05/2020 Luchtime
print failure argh 2nd failure thought i had cracked it with a brim but no, I think i might try something else next.
19/05/2020 PM
3rd attempt 20mm brim as its got very little surface area.
11% done has failed at 20 and 50% so far fingers crossed.
Right clean slate all stuff shipped off to the storage. So now clear to film and get up to date with day job.
In my spare time will start to look at the CNC machine this week. just going to rotate it 180 degrees and re-route wiring and water pipes re plum cooling bucket and aquarium pump. thinking about giving its own PC to run Mach3 off.
As the last time i started playing with cnc machine i stated running the limit switches and z probe wiring i will need to finish off loom with a quick connection of some sort.
So i am also going to have a quick go at mounting limit switches. past the point of return so time to modify the machine.
As then it’s going to make my life easier as will avoid bed crashing. whilst i learn how to program it. should be a doddle but just for some reason or other not got my head around it but to be fair time was not on my side the last 2 times were as this time every day is the same.
This is my next project in the workshop.
Coming soon as they ship it will be doing a full upgrade from mk2s to mk3s Prusa i3 as been delayed by 3 weeks at least. so some more fun coming up. to keep me sain in these strange times.
19/05/2020 AM
Morning all right all coffee up and ready to face the world.
Print failed as the dreaded 50% just as i was going to sleep so stopped it without a drama. will revisit this later on as 3 failures is enough. for me to re-slice it and try again.
First up going to print an end stop bracket system for the CNC machine and a vacuum and light system as well. so out with a roll of petg. i found these on Thingiverse last night.
Not sure its 100% right so going to print in pla and then if it works will do it petg. all sliced up and sent to the printer.
now to print
all printed will test fit after run to post office. and boy has gone to bed.
21/05/2020
Sorry for not posting yesterday was a full-on day of sorting stuff work-related as for previous parts i printed long a short of it don’t trust parts off Thingiverse anything fitting correctly as not all 3040 machines are the same. so last nights idea been playing with limit switch holders. I think i am going to mount directly to hardware using a clip i have remixed. will post images later as very hot in the workshop today,
remixed micro switch holder
just going to take some measurements and look in how to sort the z axis measurements. and toy with ideas on how to mount z fix switches to the machine might need to design something. after looking over the machine i decided i would mount front and size
position for x-axis – & + limit switches
Positions for z-axis – & + limit switch.
Going with my remix idea and tabs that i have cut down from bits i printed on Thingiverse that didn’t fit so got my side cutters out and cut it down to act as activation tabs. have used some double-sided M3 tape to hold in place to make sure all works will then drill and affix with M3 screws once i prove it all works.
X-axis temp mounted to test they both work
Z-axis temp mounted to test.
switch X- is not making contact so i am going to have to drill it so i can slide plate across as its catching on the z switches making contact to the frame before microswitch. not an issue though. will drill and tap it. i will wire all up then will super glue switches into brackets once i have tested everything.
but that will be after the sun goes down. and my little boy is in bed. as i will need to drill some more holes for the Y-axis switches run wiring in series to all the switches and back to control box. then configure mach3 to recognise the switches then should be able to home and test.
See how we go later that what i am hoping to achieve today. Then tomorrow can be wire management and first test program to check all axis’s are calibrated. also need to drill the wast board. and mount it to aluminium bed. I have gone with a thick first waste board as i don’t trust my self.
I know you all say well you have a laser and 3d printer this should be a doddle well its been my kryptonite since buying the machine. fingers crossed this will solve everything and get me up and running.
Little tight for my drill going to need an extender bar to drill and tap second mark. also need shorter m3 screws. I also marked out drill hole over top of channel so i can ge some bolts through it to scure wast board. will do the same on the back of the board tommorow as well. Amazon is my friend parts now on order for sat delivery.
So M3 tape to hold it in place till then. I will tap and wire the bottom Y-Axis 2 micro switches tomorrow lunch. going to add some quick connects for wiring. This is going to be wired from in2 on the controller board back to the ground in a normally closed loopback. i am using in4 i have connected for z probe as if its there i might as well use it. going to use a quick connector for that so can zero tool on the material.
I then will feel a bit more confident to start playing with it. As at the moment is a scary bit of kit.
22/05/2020
Have been looking in to things a little more and now think i have the answer to what to do.
As with mach 3, a home switch can be a limit switch as well. will wire homes switches as -X -Y +Z and limit switches will be +X Y+ and -Z i will also set soft limits in the software to prevent E-stop activation.
as the way limit switches work they will activate E-stop if hit. but with soft limits will slow down and stop before hitting switches. the home switches will also act as limit switches after systems been homed.
so my set up in configurations of mach3 will look like this.
port input signal set setup using pin 2 limits and pin 3 home signals but after homing they will go to be a limit switch.
I will then configure the soft limits this will prevent it from ever hitting the limit switches but just incise they fail its better to have them.
I Cannot set these up till i have wired up all the switches in place hoping to do this at lunchtime. Back, later on, to get everything ready for testing.
should not be allowed near tools drew blood but drilled out the base for micro switch holders.
drill taps snapped so have had to re-drill going to use nylon nuts and bolts to hold every thing down got to strip the bed off now the joys of life.
more work tonight before wiring will post updates later.
Prusa upgrade kit shipped. should be with me on the 28th of this month.
I will be wiring up the switches in series in sets of 3 so 3 switches on the home side and 3 for limit side. will do a diagram some point over the next day if it all works. just having a sit down as its been a full on day with little one.
right going to do this tomorrow as now figured out my wiring loom is short by 200 mm.
all brackets mounted just need to solder it all put it back together but happy with progress just wish the man cave was so hot atm 35c back in the morning. night all.
23/05/2020
Morning all just been putting together some test patterns in gcode for the CNC machine. going to cut a circle outline and hollow out a square to make sure its calibrated correctly. once i have done that i will start to play with more complex designs.
Waiting on my wife to get out of bed and boy to go to sleep then i can get on with getting my 3040T up and running. want this all finished off today. As then can get ready for the delivery of the Prusa 3d printer Upgrade kit from mk2s to mk3s. but that’s later on next week.
Been a productive lunch time nap time for me, CNC machine all re assembled z homes correctly x and y are in reverse i think i have just fixed that will test shortly and come back to you all. yup all fixed.
now to set up soft limits to stop it crashing in to limit switches.
Setup ready to test the soft limits next.
Right now to test the soft limits out and once there tested i will then test the probe tool once that done. i need to plum in the cooling pump and water put in waste board in then i am ready for test program. fingers crossed will add images later.
Paper weight no more all working over the moon going to try making something proper tomorrow. Just did a simple pattern but homes and limits work.
Have moved it back in to it enclosure re installed the wiring . then cut the test pattern again to make sure all works. and was not a fluke.
It all works bar the probe but that probably something silly. think i might add a camera as well for help with setting it up.
Anyway enjoy the images of the last few days. Last
Wast board marked out for drilling.
2 drll bits and to screw taps later yes my blood cnc 1 josh 0
Nylocks and bolted to rail.
printed a lightsaber for fun.
close up.
Wiring done
More shots of my wswitches wired up.
it only bloody works.
so happy.
Back in its enclosure
Right done for the night tidy up in the morning so happy it works time for some fun tomorrow.
24/05/2020
right been busy making a sign for my boy’s bedroom well first attempt at a sign I have managed to break my first end mill 2.0mmm well my fault as went really deep and was trying to cut 5.0mm in 1 pass.
so now going to cut in 5 passes using 2.5 mm end mill as don’t want to risk damage. going to cut at 1.0 mm per cut. also getting some ripping on the cut so going to limit clear out to 4 passes. actually preview shows its not going to clear out so will set up everything ready for tomorrow.
I have repositioning the control box as then can keep the vinyl cutter in the cave, I have put the control box next to my sublimation printer. all neat and tidy.
i had a look throught the dump bin of cnc parts i have on the wall and there was 2 more 2mm end mills so i take it every one brakes them at the first attempt. so will run the program again tonight. its a 4 part program so using 4 tool changes.
So program one material removal with a 6mm end mill. then tidy up and clean out with 2mm end mill followed by a 3mm end mill to drill mounting holes. then back to 6 mm to cut the sign out i have left tabs so it won’t flip out. going to also add edge finder scripting to make it al the more accurate tonight. more later.
Roll on making more cool stuff still buzzing from getting things working. right now to finish off the clean up of the cave. then will be ready for prusa build later on in the week. will put a go pro in to film the cut later if all goes well.
i made a think its not perfect but happy with first attempt
Lasers blown a connector so going to be down for a few days. I’m nearly all done in the cave just some more wiring and we are good to go. going to play with CNC coding over the next few days. till the Prusa arrives .
Also going to look at making a dust shoe and finish the enclosure off think some hinged perspex or something similar keeps the dust down and the noise. but got the cnc bug.
got to figure out how to film it for you enjoyment.
25/05/2020
Been busy printing dust shoe for CNC machine. i am awaiting the brush material for it should be here tomorrow. 1hr left on current bit the shoe adapter left to print. next projects engraving 3d on the CNC. I probably need some better wood samples. as only have mdf in my stock bin.
over night print 13 mins from complete.
dust shoe printed and fitted need to drop the spindle down a little bit and got 70mm brush tape coming tomorrow think i will need to upgrade my vacume but will know more once its fitted fully .
just waiting on brush skirt and will drop the spindle. giving more tool clearance for tool..
Also fixed the laser was a burnt out plug managed to make a new one out of parts box till i get a new six pin connector. So it then made wife a storage craft box to test out the machine.
bunt thought the plug
couldent shift old connector
fun box for the wife.
Last of the cleanup tomorrow and getting wiring all sorted for the second Prusa so can plug that straight in and then i am done on maintenance time to start looking for new projects my arcade machine i on hold till i can get back to wale.
Might do a design for the CNC machine to cut. to test the dust shoe nothing fancy just something see how it clears a path also want to install the edge finding script and centre finder. will do a review on my 3040T now that i have a working machine. going to superglue the micro switches in place tomorrow as well to stop slippage. right night all.
28/05/2020
Been busy few days day job and rental property getting ready for a new tenant. so got home last night and sat down in front of the computer took my 2 logo for a project me and the wife are doing. The brush i brought for dust shoe is way too long so will take 20 mm off the brush, also getting some material pull out but came out well.
Shame it did not come out perfectly. still learning cnc .
Work shop should be done in the next day or so just got a lot of day job stuff kicking around for filming once i have done that will go back to the office. and clear some more space.
quick tour of the work shop.
CNC, Cameo 3, sublimation printer and CNC Control box.
Egloo mars resin printer and parts bins.
work suff above soon to be home for 2 x mk3s
More crafting bits bins
Work bentch
Second monitor
50watt Co2 laser
way out.
small space work shop. Got a lot of equipment in a small space as you can see nice and cosy but could do with a bigger work shop.
Right time to sleep. back on tomorrow.
29/05/2020
its arrived..
tonight i have been building this bad boy hit some issues but such is life reprinting a part and upgrading a part as changed since i printed parts.
right more tomorrow.
29/05/2020
Morning all just a quick update post more on the machine build on other post later
parts are all ready
Parts have done overnight. will try them out later as off meet new tenet and then on to the office to perform a one-man stock take then back via the storage as need to grab the trapezoid nuts.
Back and found another crack in Prusa parts so 4hr print x axis motor end. oh well, such is life just been configuring second raspberry pi Octoprint whilst I am waiting for the machine to print parts. will finish off build tonight hopefully.
Ready for the printer.
More on the build post later just waiting on part to print and i am back on it.
as far as i can go as need more bits due to mk3s upgraded parts.
and more bits needed looks like i got the Mk3 extrude not the mk3s so another 8 hr print before extrudes built.
8rs of parts to print wrong code given by Prusa argh. never mind.
Z Axis done just extruder and elects to wire.
30/05/2020
Morning all parts done so just waiting on little humans nap time and will be back on it hoping to finish off today so i can do a test print.
Also going to make a tool holder for the milling machine bits. and i am thinking about making the spoil board so i can attach stuff easily to it. just got to figure max dims without triggering the limit switches. see if i get time. as have a 2 and half year old who wants me to inflate the pool.
extruder assembled x carriage is different arg back to printing bits.
hoping final print of the build done now will continue to build later but now for some quality time with son in the paddling pool.
after another late one and luch time nap time ultraviolet is build tested and calibrated ready for first print later on tonight.
All done now to move it to the cave.
Right all nearly dialed in just need to mess with z as not down enough but getting there. all installed for some reason the power relay isn’t working will look in to that in the morning might just be a lose connection i will play with it tomorrow.
away we go printing the rest of the spooler to match the printer on my Neon Orange one. z calibration square on the Ultraviolet one.
set up doen.
All installed in the cave ready for a tag team print not sure what. time to finish the spooler for neon orange.
As i ordered the orange upgrade kit might as well put the pteg to use. so spools up first followed by base tommorow. than printing all done time to look at making stuff.
as all my machines are working. and cave is nearly all organised i get back to what i love making stuff. going to take a day or so to think what my next lock down projects going to be.
01/06/2020
As lockdown continues so do i. So over night the rollers printed in Prusa orange body is now priting then will swap out the old whit spooler and replace with black and prusa orange spooler.
base printing.
will put it all together later on today once it’s done.
I then need to revisit my dust shoe as it works but not as well as i would like might get a mask as MDF dust aint good for you. also need to look in to getting more wood and maybe developing a cutting test program to experiment with speeds and feeds as info is so mixed on it.
right Base is nearly done just 11 mins remaining so will pull that off the bed later and assemble it.
nearly all done next to assemble it.
fineshed printing.
Time to assemble.
bearings inserted and ready to build.First print in tandem wish me luck .
all fitted and ready for first dual print pint-size lego man for my son. Head and hands are printing in yellow on Neon Orange and Ultra Violet is printing torso and arms in red for the legs got blue. been wanting to do this one for a long time but now i am done building the workshop. can do some fun prints.
First prints started lego man here we go.
still, some tweaks to do in the cave but nothing bad that’s going to take days. enclosure to finish on the CNC and dust sock to fix or redo will see but now printers are working CNC and my laser there ain’t much i cannot do.
right having a early night.
02/06/2020
morning all lego man head and hands done will take off the bed later body is still printing about 1 hour left will slice the legs and print later once i get back from office.
head and hands donebody is a hour off then on to legs
back from trip to the office and body is done now to slice legs and get them ready to print. think will print on violet.
body done
12hr print for the legs wish me luck all sliced up ready to print.
will clear the bed and swap filament think I will run this evening over night.
away we go at last had to reprint the arms as snapped one of the connecotors and one of the arms PLA is not as strong as PETG. arms came out nice.
arms done again.
now to start on the legs.
12hr print see what it turns out like int the morning.
Night all time to get a early one.
03/06/2020
Morning all Lego man is complete.
Fun for he last 2 days.
today’s project is some more CNC machining i think see how much time i get to play between work and playing with Macsen.
04/06/2020
I did not get time to do much due to workload i managed to redesign hand made buy the smith logo as going to try a different tool to make the logo and end mill to cut it out. will run it later also want to glue in all my limit switches in place. As i am happy system is working and with limit and home switches. The soft limits are also working well. Z probe is working well. Next, i need to implement the edge finder script a give that a test. i think i will write a post on my CNC machine as its a subject in its self.
will do above tommorow been another busy day
Just printed a camera mount for ELP Camera mount. As my lightburn camera has packed up so going to give my back up ago as cannot get another one as out of stock.
all ready to test might try calibration later before bed.
Right will let you know how it goes later hoping to get it installed. before i shut down for the night. if not will do it tomorrow.
05/06/2020
Last nights camera mount print was a not piratical for my set up so have gone over to another design i uses once before but it did not fit. The ower of the design gave the fusion 360 files so have modified it fir my ELP camera.
Original design for small lens redesign with 26mm opening for lens
2hr print. and we will see if it then fits as would like to get my lightburn camera working.
a hour in to the print.
printed fits like a charm disconnected lightburn camera and took in indoors plugged into my laptop so not sure if it my pc that’s the problem anyhow below printed EPL camera enclosure for a back up if not might use it for filming the CNC machine.
I will also re-run the designs i have been working on the CNC machine and do the edge finding script. time allowing. as have made some changes. still learning so its a bit of trial and error. time allowing later as got a lot going on today.
changes some of the processupdated logo.
In the meantime just put together a Ubuntu Linux server as going to take Octofarm for a test drive as now have 2 printers. just need to install VNC so i can log in and configure on my laptop. but for time being i have installed got running octofarm will take it or a test later on today once little persons gone to bed.
I also need to check out whats lose on my relay as power on ultra Violet is not cycling on PSU button. it’s probably a loose connection on one of the IN1 pin as lights cycle without an issue.
07/06/2020
To day has been a day of getting my printers set up on Octofarm. had a nice lie in as week end got up annoyed 2 year old opening up ssh on my freshly build Linux box used a old fan less industrial i computer that i have here was going to use for a arcade machine. but now going to move my plex set up over to it. should be powerful enough. need to export my settings off another PC as want to get all house hold entertainment running off it. ties up my bandwidth from the man cave.
was enquiring about an getting PSU control working off Octofarm and on there discord server and James said that been fixed in latest update. wow great bunch of people.
got both machines set up and i am now launching 2 x min calibration cubes just making sure is 100% calibrated before running prints. Ran Prusa bed levelling plug-in front on Neon orange and Ultra Violet. Neon orange has a dip in the front of the bed 0.47 so might install the nyloc nut mod might see if the front screw is loose as well.
back to Octofarm so far very impressed love the interface seams nice and easy to use going to then do some over night prints might do with Petg as starting to prefer it to pla.
both printers running.a very compressive dash board topa very compressive dash board bottom.
video out put screens so can show both machines running at once.
Camera screens
printer panels so you can make changes
printer control screen.
There is also file management so can deploy files to mutable printers. I Will play with more the system. it’s well worth installing for the lucky few that have more than one printer its a must. Means i will only look at one window instead of flicking between browser screens.
Have also fixed my relay issues was a loose connection on in1 so all sorted. having some wife time tonight as remotely working using Octofarm . go check it out https://octofarm.net/
lose screw front of bed going to check the rest and re calibrate. violet is acting up. so going to have try adjusting the live z as did first print for 12 hrs nothing sice.
Checked all the screws going to do a 5hr print to this bad boy wish me luck could have a ball of spaghetti.
hears hoping its prints.Away we go.
UltraViolet fails 10% in think i need to redo z height again see what happens with Neon orange.
loose on the bed think it caught on one of the circular objects.
07/06/2020
Morning all i Have woken up to a jammed nozzle will clear it later than going to redo first layer calibration on both printers but what it did print so will try this again with 2 recalibrated printers. but for now daddy son time. back later.
calibrated violet again a still getting issues with it sticking to the bed might try recalibrating it as think its too hight for bed. need to check calibration on orange.
08/06/2020
Have been busy this morning as both printers been acting up looks like orange is working again, will work on violet after the working day is over doing a sort out in the cave tonight as looking for a dongle for my CNC MPG going to test out edge finder time permiting.
as last night was a bust but have got my camera working with lightburn last night so i can now use it to position materials. will give you a demo tommorow.
09/06/2020
The search for dongle continues hoping i did not throw it out. just organising my tools and dump bins as they were becoming a little cluttered. aiming to get some of the cnc stuff done today but see what happens. as got to go into the office to send some orders out.
Neon Orange is working did the ultimate test for a printer it performed very well little drop out on bridging but not terrible might run bridging test later. I still need to dial in Ultraviolet will get on that in the next day or so.
I have revisited an old design the Aztec Starwars shield will run it using my 16mm V-bit cutter then cut out using a 6mm end mill. the preview looks awesome going to test using my USB camera witch I am going to mount on the wast board. see if i can capture it.
wish me luck.
think i will run it all tomorrow as some one dont want to sleep.
10/06/2020
looking after our boy today but have created a jobs list i want to to will up date you all later if i get some time.
11/06/2020
Made a jobs list did not get time to do any of the jobs tonight will start moving draws around as the hunt for my CNC mpg dongle continues. Going to hopefully find dongle if not will bite the bullet and order a new one off Ali express don’t fancy spending ext 80 on top of what i can order directly.
hoping to run the star wars Aztec carving tonight fingers crossed. going to mark and drill ready for perspex side. As well.
then will order a A3 sheet for tool change hatch.
12/06/2020
morning all well last night i have searched the man cave think i will just bite the bullet and order another CNC MPG as its very much needed to help with the set up of machine and will then be able to program macros so can do stuff with ease.
Learnt that trying to be clever with a cnc machine does not work. i combined tool paths in to one script thinking it would pause to ask for tool change it does not so ended up with a big mess and the part being written off. Think i will also change the depth happy with the better speeds and feeds.going to strip the enclosure back and make some changes as needs dust shoe as not sure my small vacuum has the power.
Will be working in the cave this morning doing day job filming. will get on to making the enclosure stronger but think that will involve a trip to hardware store to go some bits that might be over the week end.
launched enclosure project. Right time to sleep more tommorow.
13/06/2020
Morning all found a great dust shoe unfortunately its missing the brush part lots of people asking for it. but the designer on thinivers has not responded. i desided that i would just make the brush part so i fired up fusion360 and imported the stl in to the system. i then used it reffrence shape and make my own brush part, way to much time on my hands when looking after the boy in the morning.
The bits in gray is all me. now to print it all.
now to print it all. right breakfast time. back later.
The first print of the day is nearly done ready going to test it fits before i print the second part that will be after i have test fitted the collier to the spindle. As long as that works i will then print the collector and the brush part i designed. will be on the other post.
15/06/2020
forgot to update this post yesterday but never mind all printed yesterday just deciding on brush materials got to look in the cave for suitable if not DIY store in the week.
all ready to test
all holes for the side of the enclosure drilled and riveted going to get some cheap opaque 4 mm perspex from the local DIY store. and some insulation tape to stop dust coming out. that will be tomorrow as will be going out to the office. so will stop on my way back.
found a sacrificial broom to cut the bristles out of and glue into the shoe well that’s if i can get it to fit. The plan is to cut each bristle in 2 and put masking tape around the middle to holder them together till glued.
16/06/2020
been at work all day currently printing a vacuum adapter of my own design as then can use dust vac with sander as the way i have done the connections can be used for both cnc machine and other shop tools.
once that is done have my new MPG to install on the cnc machine so will be jumping over to the other post back later with finished hand made by the smiths sign.
17/06/2020
Not a lot happen today managed to get the MPG working last night got parts in still need to go to a DIY store and get some perspex will probably be tomorrow evening or Friday.
So at a standstill till then might start putting in edge blocks. in and seal up all corners with aluminium tape to make it dustproof. well as dustproof as possible.
18/06/2020
Managed to mark out cut out for side panel if it stops raining today will get the multi tool out and cut out the square will go to DIY store this evening and get the board i am after and some wood for cutting. will post picture if i get anything done today.
21/06/2020
Sorry been a bit quite managed to go the shops no perspex so picked up a 6mm sheet of MDF cut that to size and installed it all will do more in the CNC enclosure post. then hosted a social distancing birthday party. Was doing bits as and when i could finish enclosure yesterday just need some tape to finish off sealing its aluminium tape was foil not tape.
22/06/2020
Time for a new project now what to do think i am going to do next. But tonight i will finish off the bigger logo cut path and then my make a keyhole hanger with the new tool i picked up.
I am also going to calibrate ultraviolet so both machines are ready to run. also need to fix the relay as acting up. then all my tools are working.
25/06/2020
been having internet issues and it soo hot not been able to do much. have decided on my next project have had some issues with the wood coming loose on the CNC machine. Time to make a better wast board this will be over in a new post.
28/06/2020
Still in lockdown just in the middle of reconditioning a server for the day job and also for running of things in the man cave 48gb of ram and will be 24tb of space. going with unraid for front end have got lots of bits coming over the next few days. Waiting on new motherboard as managed to mash pins on CPU 2 was late. upside bidding on one populated with 24gb ram and have also brought 2 more upgrade processor chips for £10 as this a budget build.
30/06/2020
Sorry for lack of posts but lots going on in the back ground been working on the wast board project hit a couple of snags that i have worked out should be ready to be posted later on tonight.
Next project underway too as making clamps for wast board so have been trying out some ideas in fusion so will show the highs lows and what ever happens end of the week.
then i aslo need to do some laser engraving or engraving using cnc machine on a side project for friends.
not sure whether to end this post here and just do project updates as got a lot going on work-wise in the background. so might just go down to doing updates on individual posts. as this will be a long read.
This is the for any one who is producing masks for this group which intern is supporting the uk Health service supplying masks to people who have non.
you will need 4 sheets A3 3mm laser ply and 1 sheet A4 3mm laser ply.
Please download the lightburn file here or the svg’s here.
cut each sheet you will need some M3 25mm hex screws and m3 nuts 16 each of them.
to assemble use small washers on the the material holder as pictured below.
wooden washer
you will have nuts and screw thread behind this holds in place when piushed against a work bench.
Next version will have wood en edge here.
Next bolt the edge pieces all around as shown below now your ready to cut some materials.
ready to start cutting.
fisrt hole punch 5 or 6 sheets at a time place in 4 hole hole punch and punch then flip them over and place on the material location pegs.
fitted to the material pegs
now place cutting board on top of the PVC or material.
ready to cut
now to cut the corners using Stanley knife run it across the edge of the cuter board will take 3 or 4 light passes to cut through then do the other edge.
now remove cutting block and place in the box ready to ship. now punch cut repeat.
remove screens
put in a box ready to ship
remove waist material
dont litter and recycle
please share and help other help the hole of the medical key workers in the UK and the world. join and help Key workers PPE 3D Support
Mancave prep for mass production of face plates on my laser cutter.
Going to start running Face masks on my 3d printer and cutting face masks on my laser to give to our health service. this is a community-based project please join the Facebook group
Update 1 material has been ordered. I have chopped 3″ off my workbench table and dropped it to down have added secondary fan as internal one is not the best. have cut 100mm hole and added vent for taking all smoke away. will take pictures when I have some time to do so.
03/04/2020
going to clear up the rest of the cave today to get my printer going to be my first attempt at printing petg wish me luck will post the outcome later. my screens material should be delivered tomorrow. will then run 100 screens for the makers collective if you want to join please join https://www.facebook.com/groups/210620746699307/
Test mask printing
2hr 45 mins later fist test off the printer.
04/04/2020
Waiting on materials to start cutting the faceplates should be here this afternoon have also had the group leader Darren on the phone as will take delivery of more materials this week and cut more for the group. Materials arrived 100 face masks cut all my material done.
Quick video of machine in action.
fist screen test fitted like a glove
100 SCREENS LATER all in under 1hr.
Will be setting up octoprint later got a new case coming that is wall mounted. i will then be able to set push notifier to tell me when each mask is done.
05/04/2020
Gone back to an old faithful added a wall-mounted case for my raspberry pi 3 with latest build octoprint so i can monitor the masks and notifies me by telegraph when jobs are done or fails.
Back on with printing masks till i run out of filament. just uploaded new design for 2 at a time the joys of pursa software and octoprint link function. so sliced and uploaded love it.
next 2 on the printer running out of white filament eek.
Away we go. time to print and a time laps. will upload it tomorrow. did one was not great have moved printer and currently running 2 more as pictured above. so will show afterwards.
06/04/2020
printing more frames was an another 2 am in the morning shift. and up early with the boy and work. feeling a tad tired.
running at 200% speed to keep the production line going.
09/04/2020
Right been a few days of work going on making frames all day every day and cutting screens for masks. whilst entertaining a 2-year-old. fun times. cut 100 screens last night will do another 100 tonight.
have designed my own cutting jig will release design when i am 100% happy with it.
100 hand cut screens
Cutting Jig
37 Frames and growing
have also installed octopod so now get pinged when the print is done so i can go clear the bed and start the next print currently running at 250% speed. getting 2 frames every 2hrs 30 mins
Right i am back have shut down office now working from home so will have some time to get bits done in the cave i have been putting off for a while.
first up going to cut a hole in the wall for ventilation fan for the laser will also be moving the laser to the other side of the workshop making more space. Scratch that might just slightly rearrange it as might be able to free up some space. buy removing some bits
First up going to remove the rest of the equipment on the laser current racking.i am going then take the laser off the tabletop remove the tabletop and reposition the tabletop. also going to cut the racking down buy 3″ before I put the laser back on. wish me luck
will post images once i have done this will do a before and after.
Wishing every one well during this uncertain times.
Due to current global issues, i have had to go into armageddon mode, As keeping the family business going in my main priority so once i have sorted remote access for all my staff. made provisions for all aspects of the business. will start blogging again and if we get locked down in the next week or so will have some time on my hands to sort some small projects with my backlog of bits i wanna do.
As i have lots of ideas for this will start off simple with some resin and ink with some star fx glitter and glow powder this might be cool it might be crap but intend to film it all the same.
I got some cheap silicone moulds off wish which i ordered over Christmas they finally landed so i have a mix of square and round coasters to play with.
Did some testing for a future project with some glow in the dark powder which worked well might do some moulding in a future project where i will show you how to make silicone moulds.
Now to do a Square coster so for this project i decided to some calculations on how much resin the coster will require as on my test i didn’t have enough resin to fill the 2 costers. so, in this case, i know the moulds 10cm x 10xm x 0.75cm which gives me a volume of 75 cubic centimetres 1 cubic centimetre = 1 millilitre so are going to need 75ml of resin per coaster.
As i am still a novice and will be using my starter pack of resin i brought from hobby craft. Pebeo Small Crystal Resin Kit will be buying more industrial sizes of resin in the near future as its quite fun to play with.
Safety first on with my nitrol gloves down with dead sexy pin Ikea silicon matt to stop mess on my workbench.
So this a 2:1 ratio so now for the maths 75 divided by 3 = 25 ml of hardener and 50 ml of resin out with the mixing jug for me. time to mix the resin do this in a gentle motion so as not to cause bubbles as i don’t have the money to get a vacuum vessel and pump at this moment. once mixed its time to add some colour as want this coster to be spacey i am going to add some Baja blue alcohol ink. I use the Jacquard Pinata Color inks as had them lying around from a prior project going to add drops till i get the right kind of darkness.
Next, the pour will fill the coaster halfway time to add some colour and sparkles and some glow powders going to use blue glow powder with some other colours this is totally free hand may look good may look rubbish but will hopefully be awesome.
got carried away with mix could more so do more. started off with the base blue but also pored one-pot with white ink and white glitter and white stars also added white glow in the dark powder the other with same just using silver glitter and stars and gold ink. will be putting the video together the next day or so just some shots to whet your appetites and yes it glows.
This was my second attempt. this is my fav one of the 2 as did exactly what i was aiming for and did forget it glows.great gas clouds perfect not to let it dry.
been buying quick release bits from wish and other suppliers just storing them in bags is not cutting it any more to time a made a storage tray for them all. was doing a tidy up in the cave last night came across more bits. put them in a draw. was lying in bed about to sleep when I had this design in my head last night waited till morning to put it into a design. the joys of dyslexia.
I had made a shelf for my retro pi NES box last night teaching my self new skills with tabs so i thought of what i had done and thought how to incorporate it with the design i was thinking of to make it a wall-mounted shelf.
Back showing tabs.
Quick and dirty retro pi shelf
Done works well
So the principle for this is that all screwdriver hex bits are 1/4″ or for us, brits 6.35mm hex so on that principle i am going to do a test cut to make sure if i use the laser to cut that size it will fit if not will adjust its size.
first up lets design the tray going to be made up of 3 layers.
The first layer will be the baseboard and slider, Slider I hear you say what that for, all will be explained in the design. layer 2 and 3 will hold the bits.
Time to fire up my trusty Lightburn software to design and then cut it using a laser cutter.
Have made H counter leaver design for the wall if this does not hold the weight might go from tabs to another idea but cross that bridge when we come to it.
The first draft of the tool shelf with quick slide made the design up on the fly. for 4mm MDF
I will release the design once i have perfected it as with any project it might or might not be 100 per cent right the first time but let’s give it a go.
Time to test the hex size and then cut the full pattern, the joys of using light burn select the test part and then turn on cut selected graphics will only cut the one hexagon so i can make sure it fits.
Don’t forget to turn the option off after test cut.
Tested and yes i was right it was a little off and my thoughts of it being wrong were right so a little tweek. So now to test cut the design and make sure it all fits together before i glue it.
Wait I just thought of something to make it better!
Ok, i have decided to make 1 design change before the first cut to make the shelf more stable by adding second stabilization bar to stop any movement when taking the shelf in and out. the joys of having a dyslexic mind can figure out issues without even putting thigs down on paper.
Spot the 4 extra tabs in the design.almost done.
So to assemble going to use 4 m3 screws and nuts to hold the 3 layers together will then mount to the wall using 2 X 4mm self tappers. going to glue using quick contact spray and glue.
Screws ready to put it together.Screwfix special nice and cheap but great. all glued right few issues but let mount it on the wall.
All glued let’s mount it and test it.
Not as tight as i want it. on the hex time to modify.
I am going to revamp the design slightly as a little too much play in the hexagons. and 2 back screws are binding so removed works fine so might just change base plate slightly to get it to work as well.
So back to the power of lightburn. Changed the dimensions by .300 in x and y to get a tighter fit. will test it tonight. I removed 2 back screws to stop it hitting the cross braces. I then took a few mm out of the back to stop it binding. will do cut of modified bits tonight and post findings later.
The fix changed the dimensions of the hex.
Will update this later once i have had time to cut modified bits. will then post the design.
did some more finessing of the design to make it much more usable have adjusted holes to make a tight fit and removed all bolts apart from m3 which are used for aligning the 2 hex panels during alignment and then glued boards in place.
the updated file works fine.updated not bolts version just glued in place
all working fine.
Lightburn File download. please find a link to the file i have added information to the file that should be removed LINK
Thought i would out a quick video for your entertainment as ran lots of these before Christmas as gifts for son’s nursery they are quick and easy to do.
Enjoy the video.
Heres how i did it in non-video format.
Step 1.
Open up Lightburn create and name in whatever font you like in my case have used army chalk font and my son’s name.
Step 2.
Using the offset toolset 3mm or bigger offset outwards with rounded selected.
Step 3.
Then i add the Ring for the keyring. this is done by adding a 4mm circle then adding 4mm offset as shown below.
Step 4.
Time to join them together place the rights and the outer edge together as shown below. select the outer edge of the keyring and outer circle then select the weld all shapes tool just below the offset tool.
Selected edges before the weld.Selected edges now joined after weld.
Step 5.
To change the inner test to engrave path. in my case, I have the blue layer set for engraving. so, first of all, I select the text. then click on the blue layer to change it to fill layer.
Inner text selected before i then clicks on my blue layer to change it to a filled layer or engraved.All ready to engrave and cut.
Step 6.
Settings in my case as i currently using 4mm Laserply that is a little unstable with glue blobs i currently cutting at 40% power 4mm/s and Engraving at 65% power and 350mm/s. now it’s ready to engrave and cut. This usually is around 2mins per keyring. can be done with an array of fonts i tend to do sheets at a time to make it cost-effective.
Step 7.
Wood prep work i tend to go over my laser ply boards with 400grit sandpaper on my orbital sander both sides before applying paper finishing tape. can see me smoothing it down int he video. now ready to cut.
Step 7.
Clean up and ringing of the key rings. i tend to peal all finishing tape and then light sand if needed i then grab my keyrings that have a solid ring with a split in it using snub nose pliers i insert it inside the ring and force apart i then place the ring through the wood and close using the pliers. bit hard to photo there is some over headshots of this in the video.
Finished items. from the video.
can use whatever font you like. to do this.
hope you enjoyed this project as much as i did. great gifts and work out under 50p each to make. did 100s of them over the Christmas and new year for friends and family.
New projects got some fun idea coming up on the site already filmed the next video which i will post this evening. if time allows it as have been busy working on getting on of my rental property ready for new Tennent.
Have already filmed another video that one is more of an experiment to improve a project i saw over on a friends youtube channel.
So the next video is a how-to make quickly customizable keyrings for gifts using a laser cutter and lightburn software.
Followed by Resin pour using ink and glow in the dark powder if this works will lead on to a bigger project as thinking of doing some night lights for my boy using led fairy lights and some resin cast stars will be also making my own silicone mould to cast the stars.
Hoping to get my CNC machine working as well as want to do some cool stuff with that shortly.
got any ideas for a project and need some help drop me a line as always looking for ideas and would love to help some other bloggers or youtube channels.


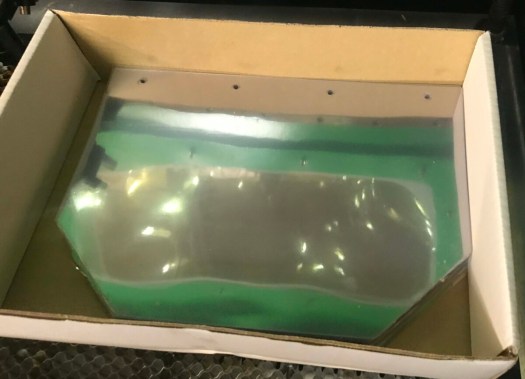


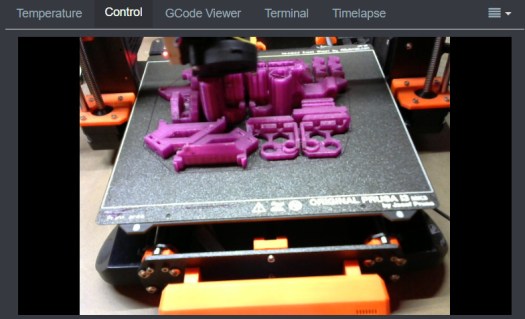
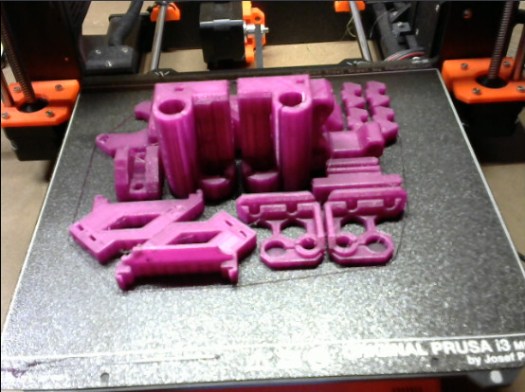


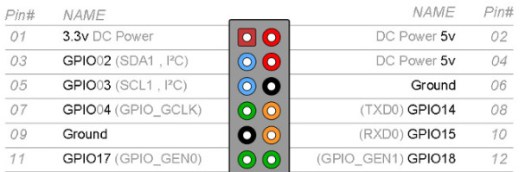


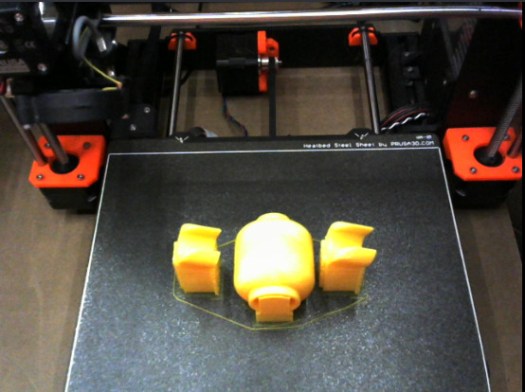


You must be logged in to post a comment.